How to Fix Twitch “Could Not Access the Specified Channel or Stream Key”
Trying to start your Twitch stream only to be met with the Could Not Access the Specified Channel or Stream Key error? We have a solution.
If you are an aspiring Twitch superstar and you’ve recently run into the dreaded “Could Not Access the Specified Channel or Stream Key,” don’t worry–you’re not alone. Many users have experienced the same issue, and there are several things you can check to make sure that your stream settings are set up correctly. Here’s how to fix the Could Not Access the Specified Channel or Stream Key error on Twitch.
How to Fix Could Not Access the Specified Channel or Stream Key
The “Could Not Access the Specified Channel or Stream Key” error occurs because of a network or connectivity issue or an incorrect stream setting on your Twitch or streaming software. To fix the Could Not Access the Specified Channel or Stream Key error, you should reset your stream key, connect your account directly to Twitch with the in-app options, ensure your streaming settings are correct, and make sure your firewall is not blocking you from streaming. See below for a step-by-step guide on all the fixes.
Check the Twitch Status page for any system outages.
Method 1: Resetting Your Stream Key
Resetting your stream key is the first thing to try. Sometimes your old key will become invalid or disconnected, and you’ll need to refresh the key in both Twitch and your streaming software.
To reset your Stream Key:
- Visit Twitch.
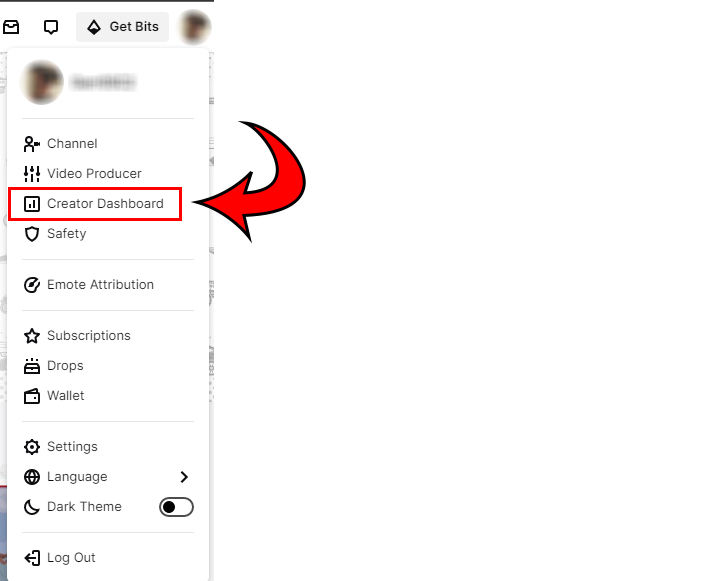
- Click your profile picture in the top right.
-
Click Creator Dashboard.
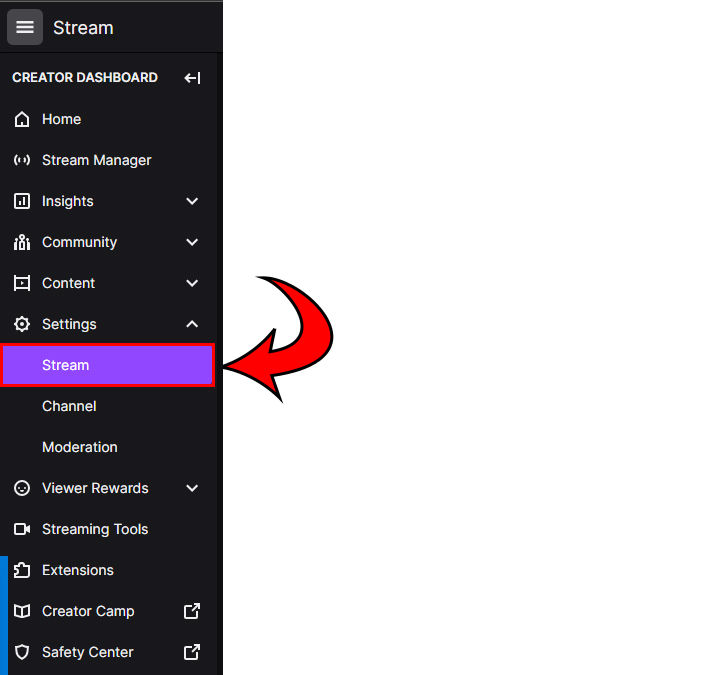
- Select Settings.
-
Hit Stream.
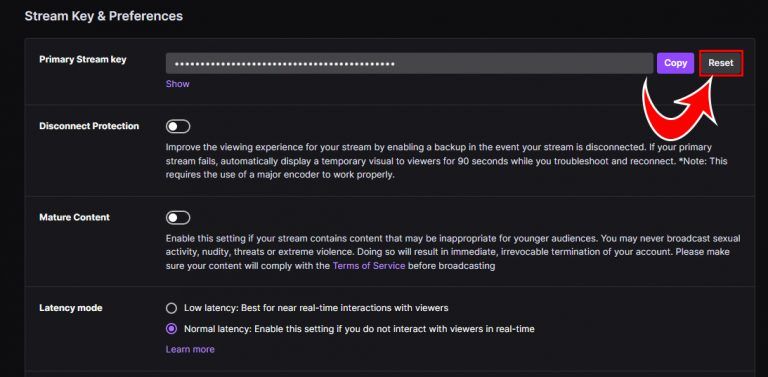
- Click Reset next to Primary Stream Key.
-
Copy your new Stream Key to your streaming software.
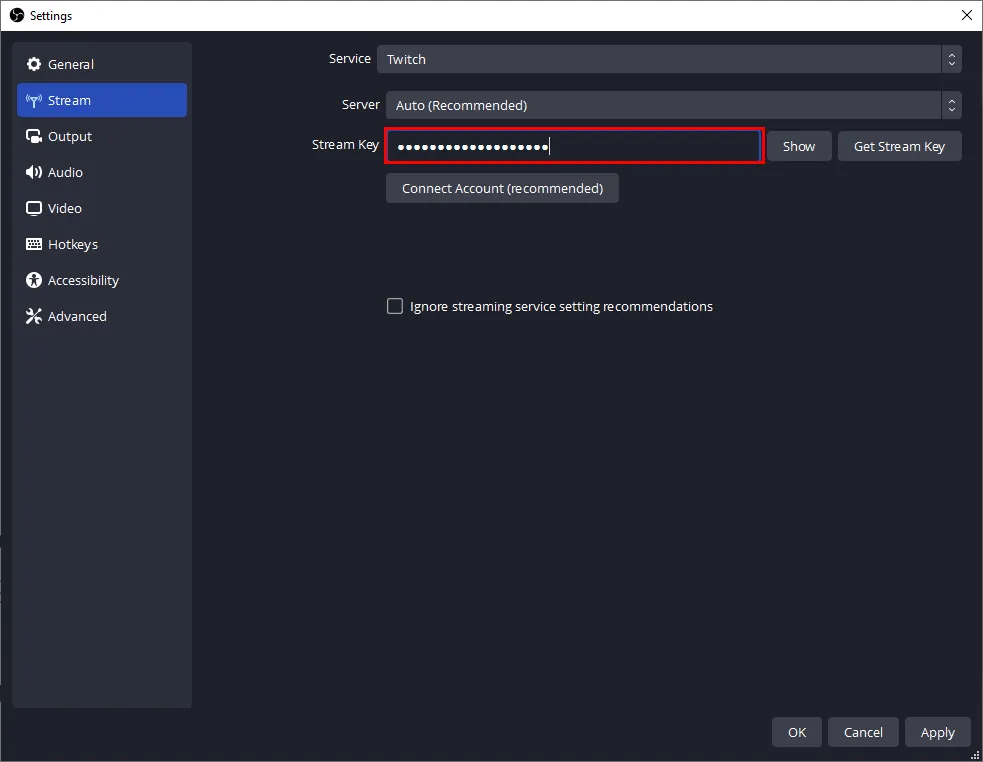
Ensure that your Stream Key matches your Stream Key in your streaming software. If you’re not sure where to find your Stream Key, keep reading.
Setting Your Stream Key in OBS
To set your Stream Key in OBS:
- Open OBS.
- Click File.
- Click Settings.
- Select Stream on the left.
- Click the Use Steam key.
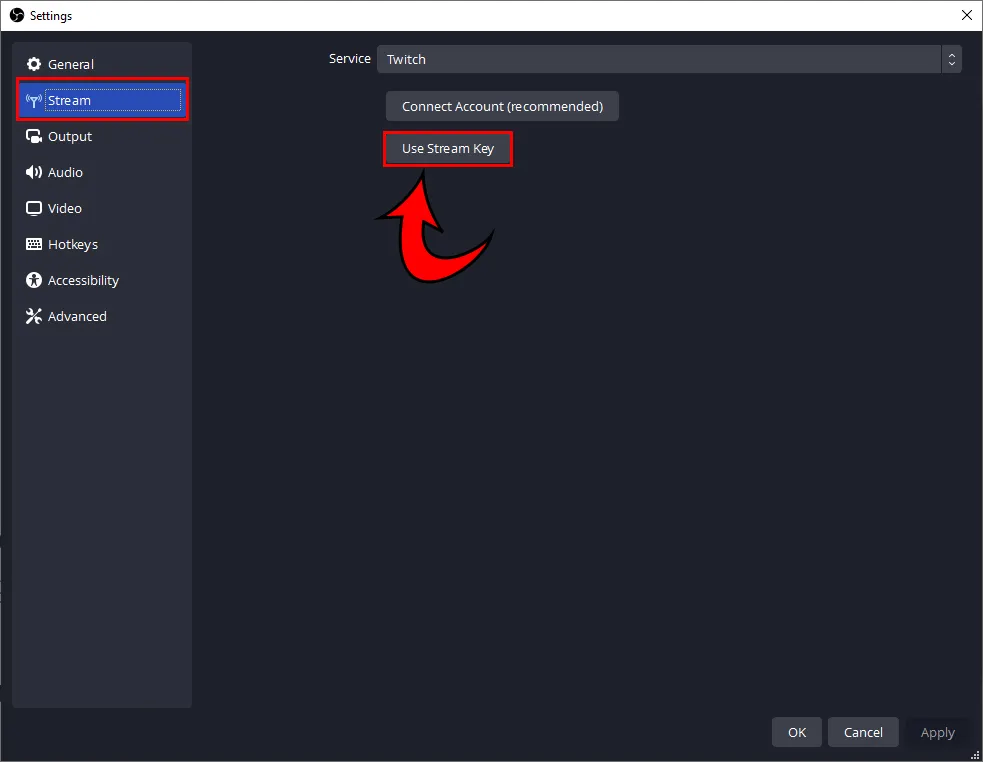
- Paste the Steam key into the field.
If you use Streamlabs, see the guide below.
Setting Your Stream Key in Streamlabs
To set your Stream key in Streamlabs:
- Open Streamlabs.
- Hit the ⚙️ Settings icon in the bottom left.
- Click Stream.
- Click Stream to custom ingest.
- Paste in your new Stream Key.
If you’re still getting the error after resetting your Stream Key, try the methods below.
Method 2: Connect Your Streaming Software Directly with Twitch
Connecting your Streaming software directly with Twitch may fix the “Could Not Access the Specified Channel or Stream Key” error.
Connecting a Stream Key from Twitch to your streaming software is a somewhat outdated method of setting up your stream. Streamlabs and OBS now have a built-in function to connect your account.
Connecting Streaming Software Directly with Twitch in OBS:
- Open OBS.
- Click File.
- Click Settings.
- Select Stream.
- Click Connect Account.
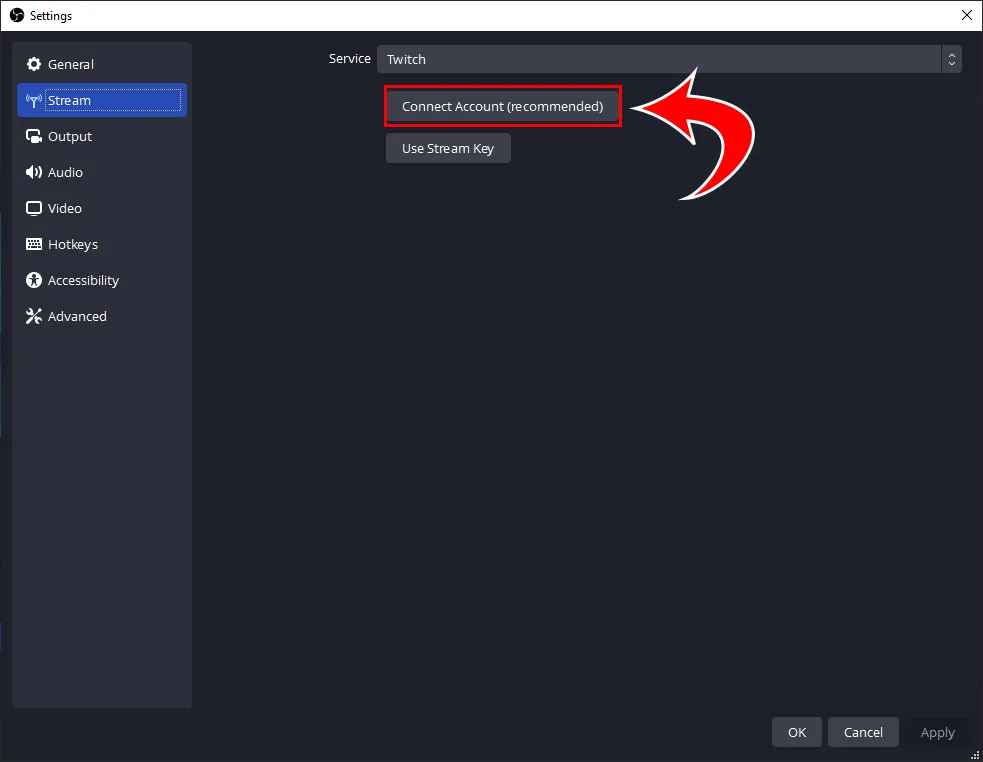
- Log into your Twitch account.
- Enter the confirmation code from your email.
Connecting Streaming Software Directly with Twitch in Streamlabs:
- Open Streamlabs.
- Hit the ⚙️ Settings icon in the bottom left.
- Click Stream.
- Click the Connect button next to Twitch under Stream Destinations.
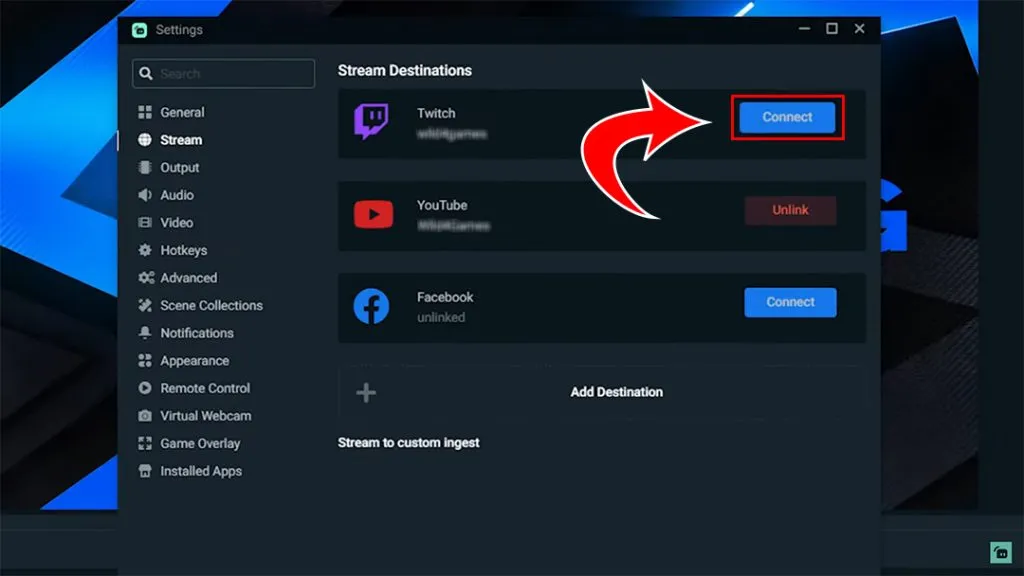
- Log into your Twitch account.
- Enter the confirmation code from your email.
Method 3: Set your Keyframe Interval to 2
Another thing that may fix the Could Not Access the Specified Channel or Stream Key error includes editing your Keyframe Interval to 2 in your settings.
Setting Keyframe Interval to 2 in OBS
To set your Keyframe Interval to 2 in OBS:
- Click File.
- Click Settings.
- Hit Output.
- Scroll down and type 2 next to Keyframe Interval.
Setting Keyframe Interval to 2 in Streamlabs
To set your Keyframe Interval to 2 in Streamlabs:
- Open Streamlabs.
- Hit the ⚙️ Settings icon in the bottom left.
- Hit Output.
- Scroll down and type 2 next to Keyframe Interval.
Method 4: Adjusting Firewall Settings
- Type Windows Firewall in the search on your taskbar.
- Click the Allow an app or feature through Windows Defender Firewall link.
- Click the Change settings button.
- Select the Allow another app button.
- Navigate to your streaming software .exe file and select it. The default file location for OBS is C:\Program Files\OBS-Studio\bin\64bit.
- Click the Add button.
Method 5: Ensure your Internet is Fast Enough
- Visit Google Speed Test and press the Run Speed Test button.
- If your Upload Speed is under 5 Mbps, you may have trouble streaming on your connection.
If you don’t have fast enough internet, there are not many fixes, especially if it’s due to your ISP. You may want to consider switching internet providers if this is the case.
Hopefully, if you edit all of these settings, one of the fixes will work for you.
To see more OBS guides, see our OBS Section.


