How to Remove Watermark on Photoshop
Have a watermark you need to remove? Learn how to remove watermarks from photos using Adobe Photoshop in this quick and easy tutorial.

Watermarks are meant to act as ways for artists and photographers to protect their work, so they get paid for the time they invest. However, there may come a time when you’re low on funds and can’t afford the stock images. While we always recommend paying for paid stock images, there are ways to remove a watermark. Follow the steps below to learn how to remove a watermark in Photoshop.
How to Remove Watermark on Photoshop
To remove a watermark on Photoshop:
- Create a duplicate layer of your photo by right-clicking your image layer in the bottom right and clicking Duplicate Layer.
-
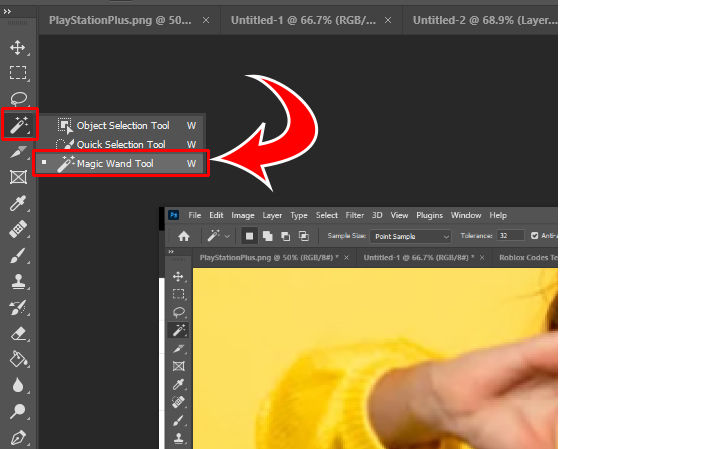
Select the Magic Wand tool on the left toolbar.
- Zoom into your image and left-click the watermark.
-
Select the entire watermark. Hold Shift to add to your selection and ALT (Windows) or CMD (Mac) to remove from your selection.

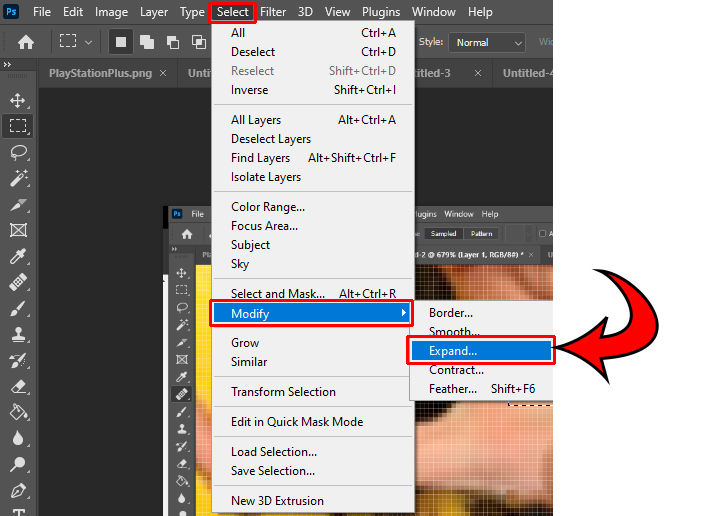
- Click Select at the top.
-
Hover over Modify.
-
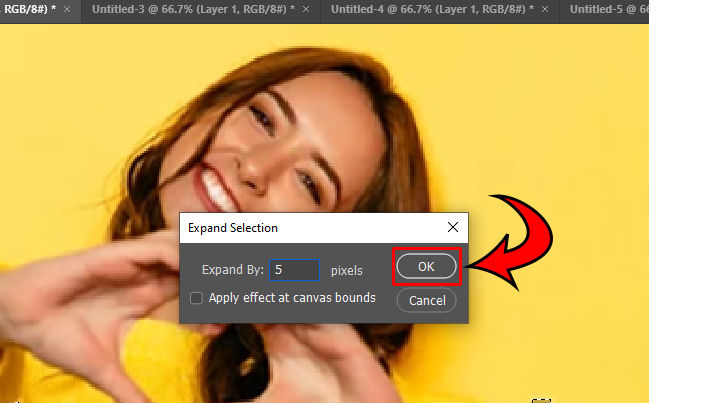
Click Expand. Select anywhere from 1-5 pixels, depending on the watermark’s size. The goal is to select the entire watermark around the outside edges.
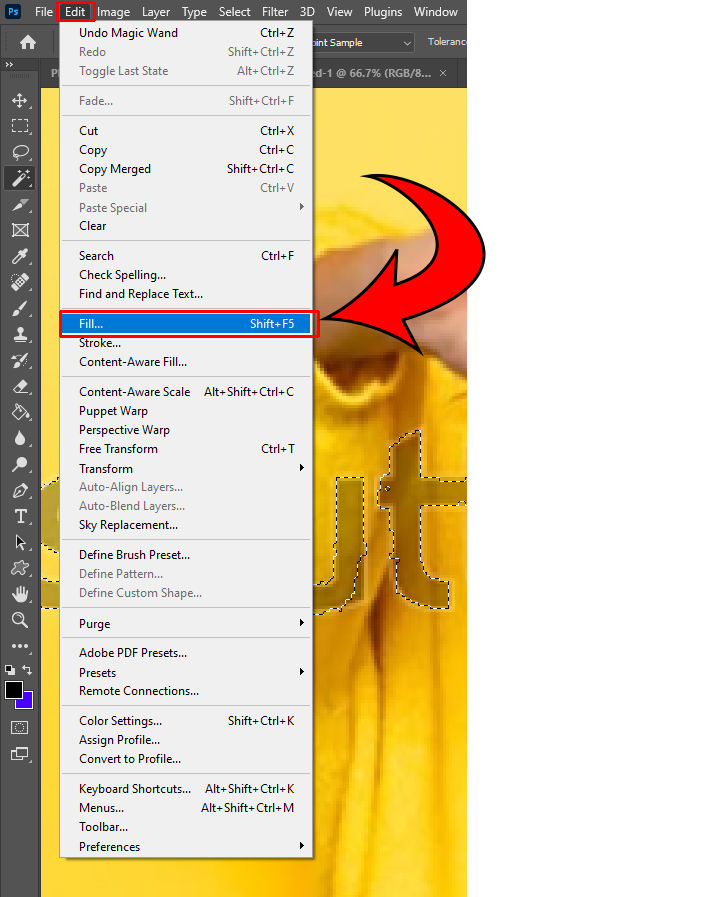
- Click Edit.
- Select Fill.
-
Next to Contents, click Content Aware.
-
Click the OK button.
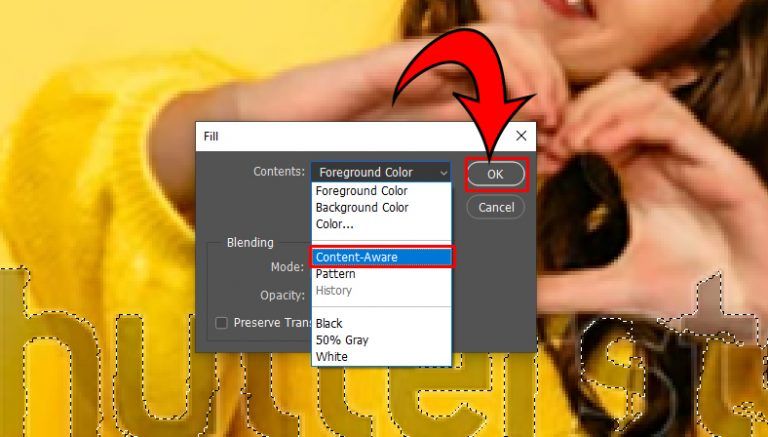
Adobe Photoshop will now load, fill in the area, and remove the watermark. Zoom into your image to gain more control and increase the accuracy of your selection. The result will be better the closer you select the watermark perfectly.
After doing this, however, everything may still not be perfect. That’s where the healing brush tool comes in. Continue reading to learn how to tweak your image to perfect it.
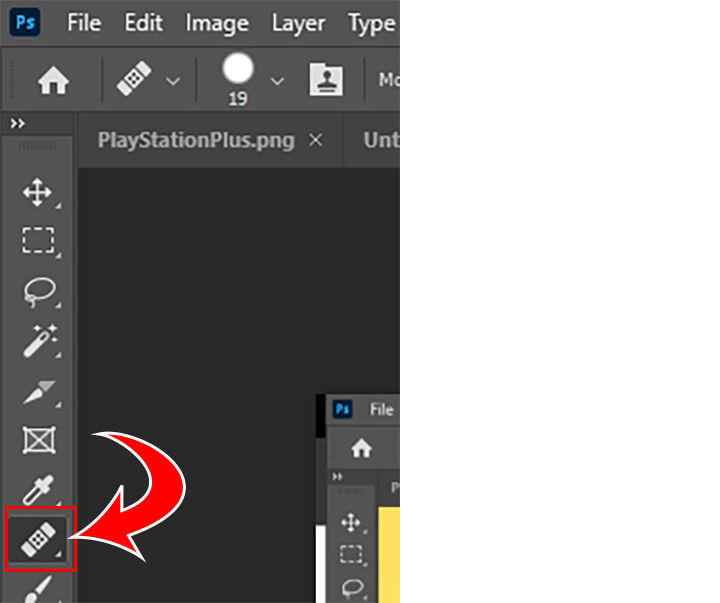
Using Healing Brush for Final Touches on Watermarks on Photoshop
To use the Healing Brush to finalize touches to a Watermark in Photoshop:
- Select the Healing Brush tool under the Eyedropper tool.
- Hold ALT (Windows) or CMD (Mac) and select directly next to the area you want to fix.
- Left-click over the area you want to fix with the tool. Using small strokes and zooming in works best.
- Continue tweaking your photo until it’s exactly how you want it.

Continue to tweak and zoom into your image with the Healing Brush tool to make it appear natural. It might take a few tries, but it’s okay since we saved the artwork on our master Layer.
And there you have it! Now you have a professional high-grade photo without the watermark!
We hope that this guide showed you how to successfully remove the watermark on Photoshop. Now you can have the exact image that you want!
For more Photoshop walkthroughs, see our Photoshop Section.


