How to Photoshop Someone Into a Photo
Looking to add someone into a photo using Photoshop? This tutorial will show you how to do just that in a realistic way.
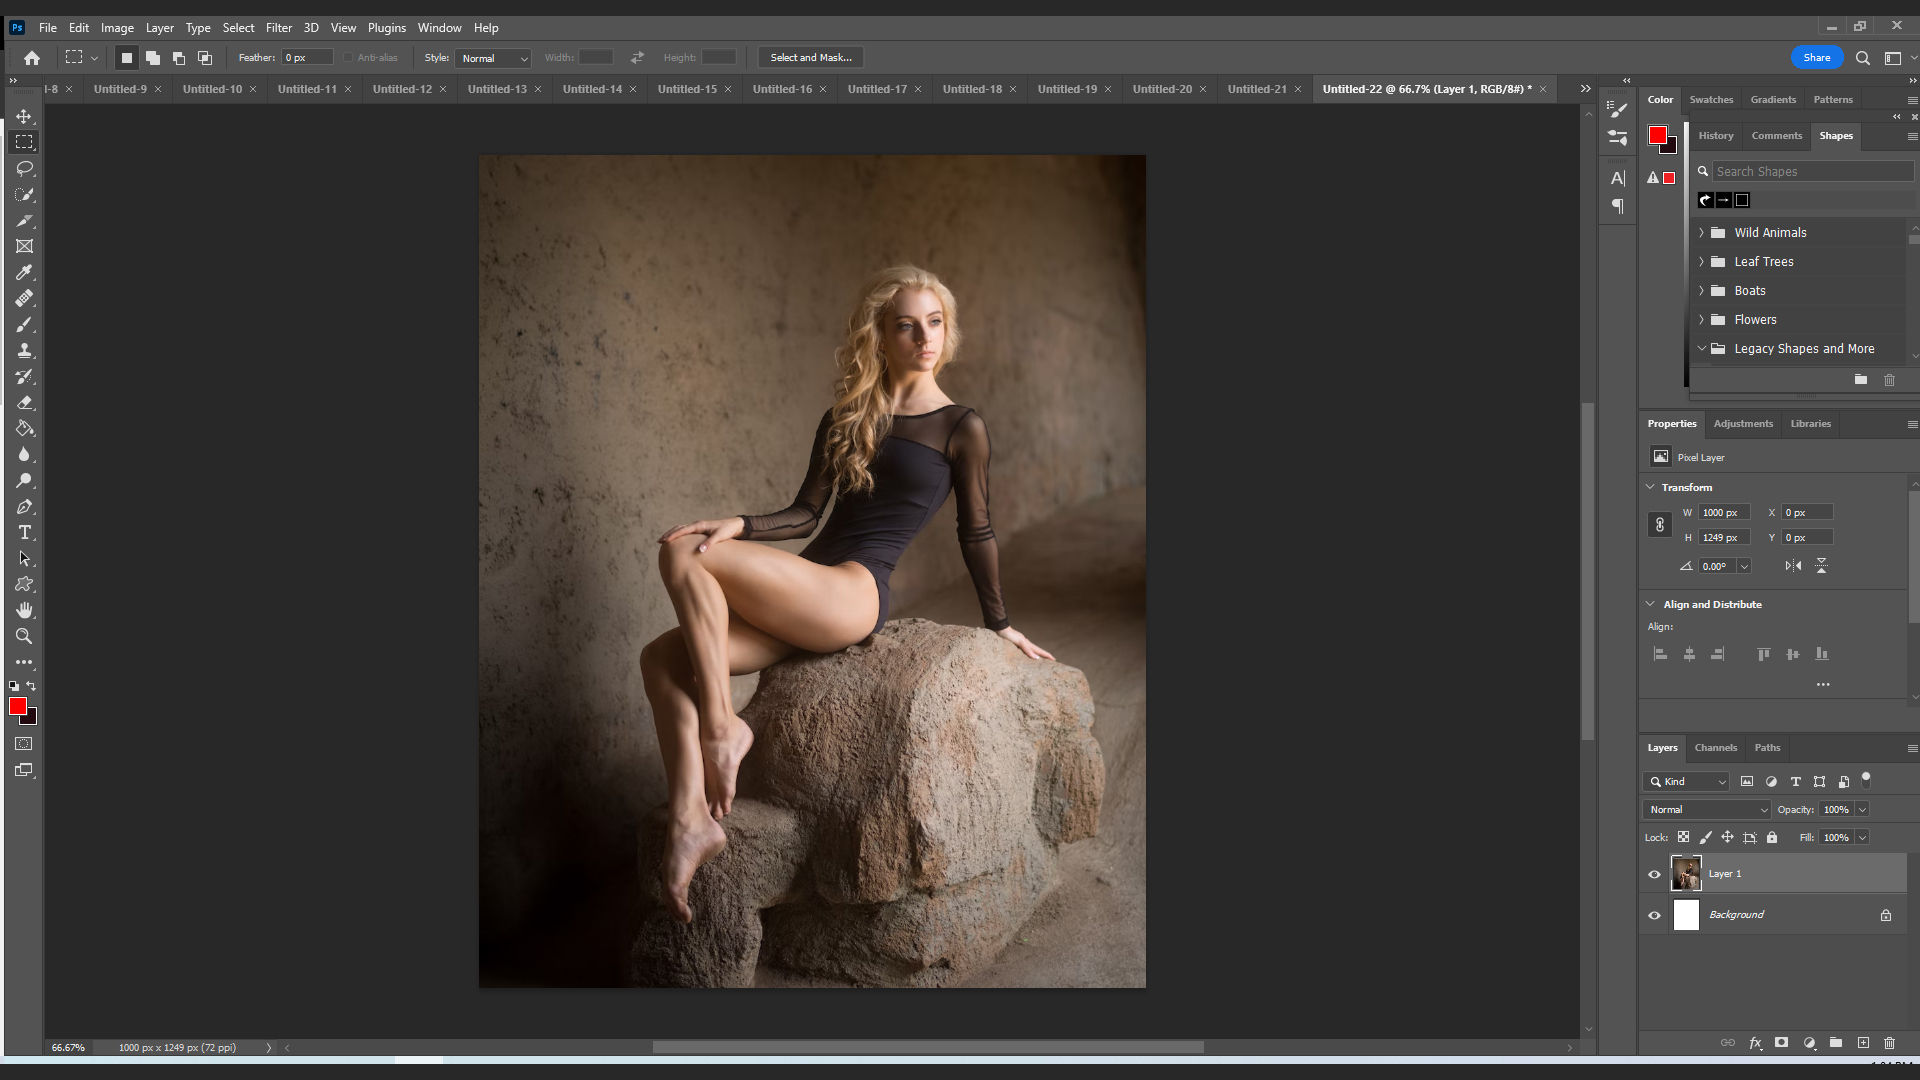
In graphic design, adding a person to a background or image that they aren’t actually in is called compositing. A widely popular technique, graphic designers use compositing to insert all sorts of images and photos into different scenes. If you want to be able to Photoshop someone into a photo, it’s actually quite easy. What’s harder is being able to make the new photo actually look realistic. Here’s how you can Photoshop someone into a photo in a realistic way.
How to Photoshop Someone Into a Photo
To Photoshop someone into a photo, you’ll need to select the model with the Object Selection Tool, place them in your background, then apply a layer mask to the model. Once you’ve added the new background, you’ll need to clean up your photo’s lighting. See below for a step-by-step guide on how to do all the steps.
Step 1: Adding the Person to a New Background
To place someone into a new background in Photoshop:
- Open your person image and your background image in different tabs.
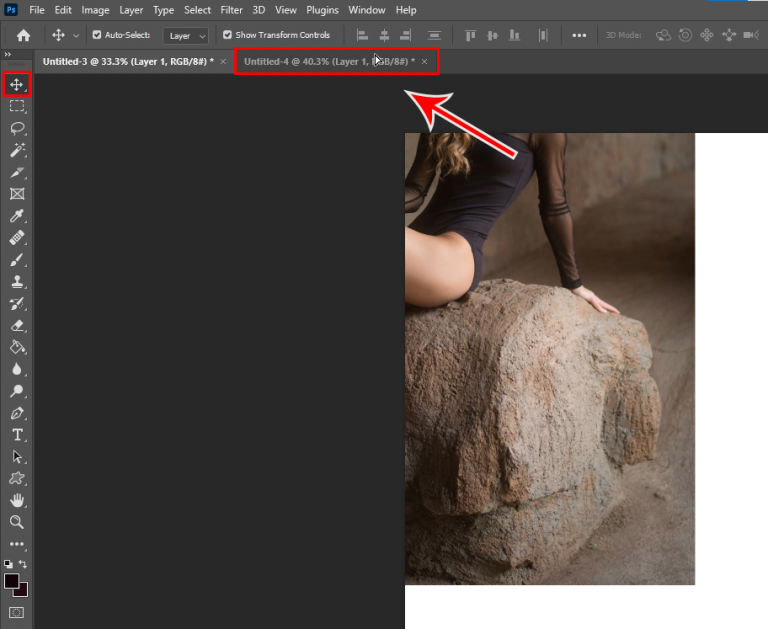
- Select the Move Tool.
-
Click and drag your image to the background you want to place it in.
-
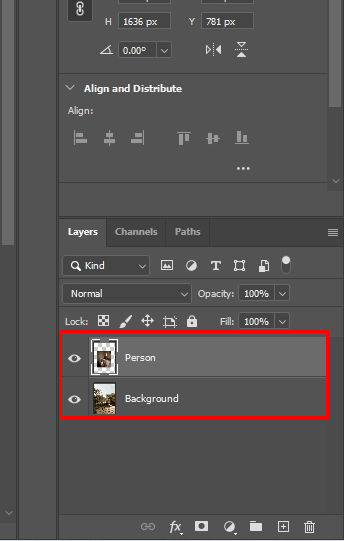
Rename your “person” and “background” layers.
-
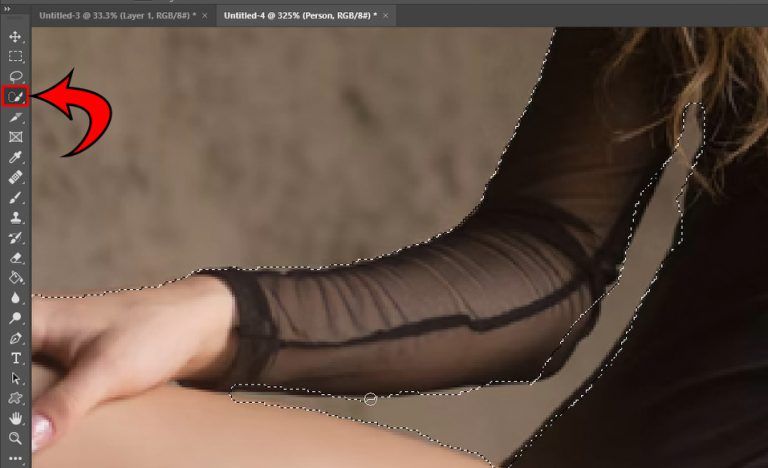
Select the Object Selection Tool.
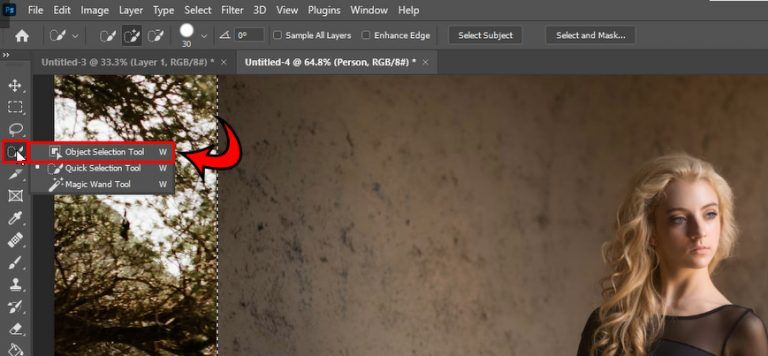
- Click on your person.
-
Zoom (Control+Mousewheel Up) into the image and use Quick Selection Tool to clean up your outline. You can add or subtract to the outline with the tools above or with the Alt (Windows) or ⌘ Command (Mac) key.
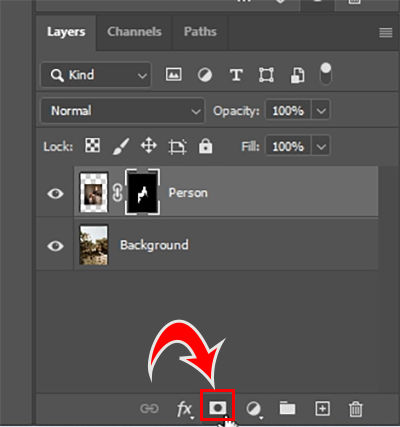
- Click your person layer.
-
Click the Add Layer Mask button in the Layers Window.
-
Adjust the size of your image by clicking and dragging on the edges of the image.
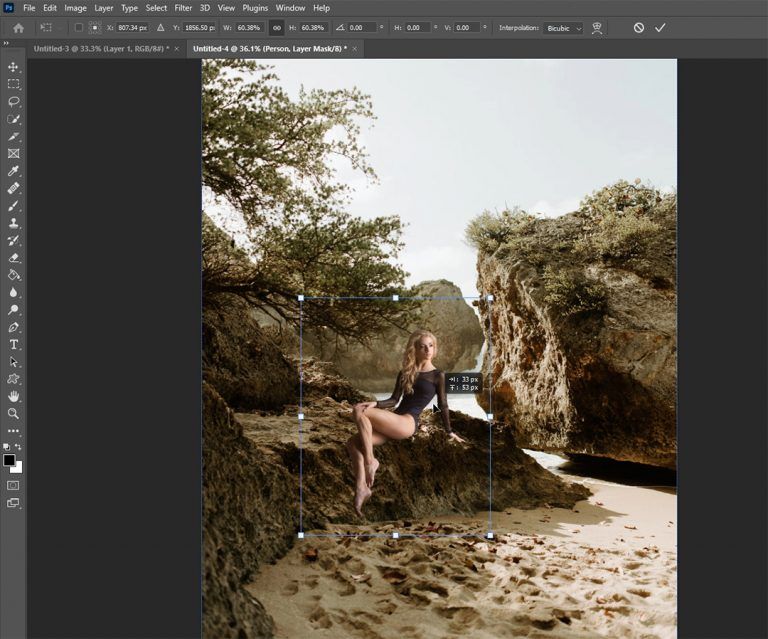
And there you have it! You’ve now added this person to a completely different background. But, it doesn’t look exactly realistic, does it? Luckily, there are things we can do with Adjustment Layers to make our image look more realistic.
Step 2: Cleaning Up the Image
To clean up your image:
- Click your person layer.
- Click the Adjustment Layer icon at the bottom.
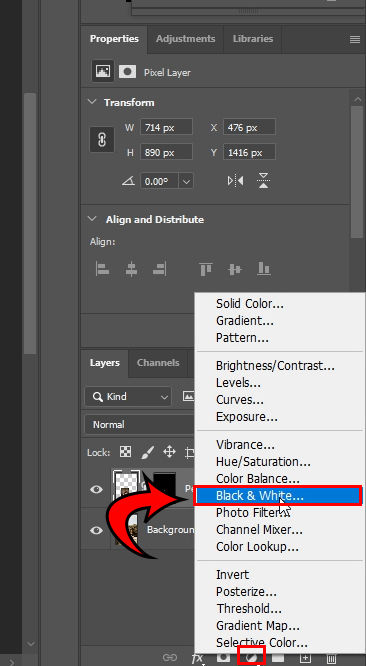
- Select Black & White.
- Clip the new layer to your person layer by clicking the icon.
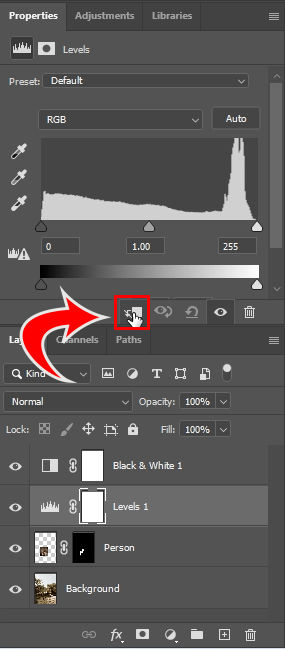
- Click the Adjustment Layer icon at the bottom.
- Select Levels.
- Adjust the handles and match the colors. Look at the darkest and lightest portions of your image and try to match everything.
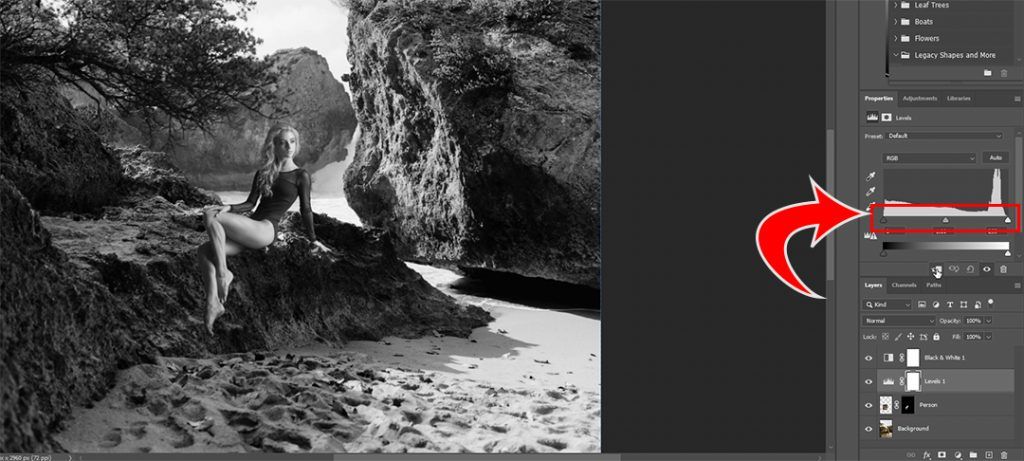
- Hit Normal and change it to Luminosity.
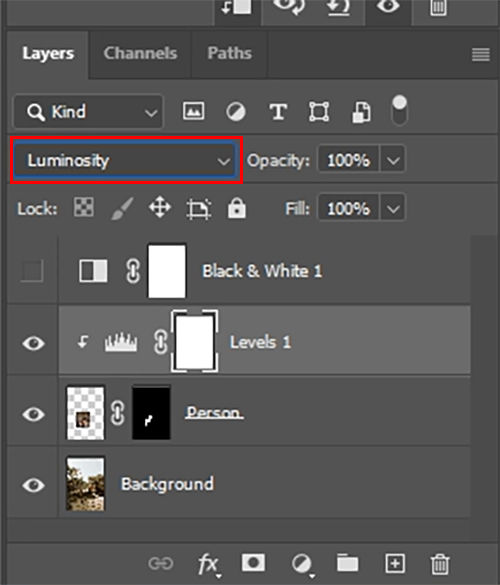
Your image should look a lot more realistic now, but might not be perfect. The last thing you can do is adjust them with Curve and Hue/Saturation Adjustment Layers to try to perfectly match the colors as much as possible with your model and background image.
Step 3: Adjusting the Colors with Curves and Hue/Saturation
To adjust colors with Hue/Saturation in Photoshop:
- Click the Adjustment Layer icon at the bottom.
- Select Curves.
- Click the Focus portion of your layer.
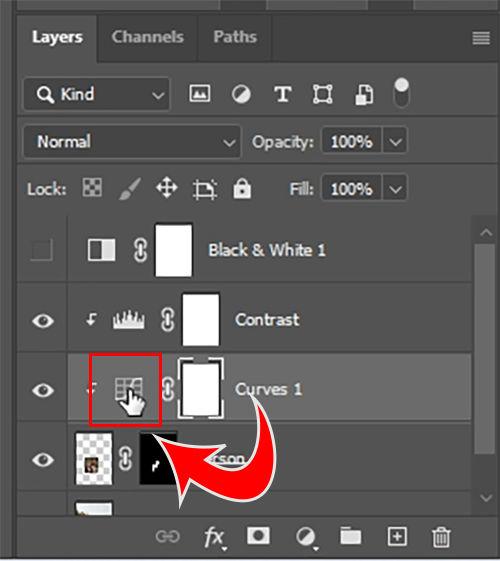
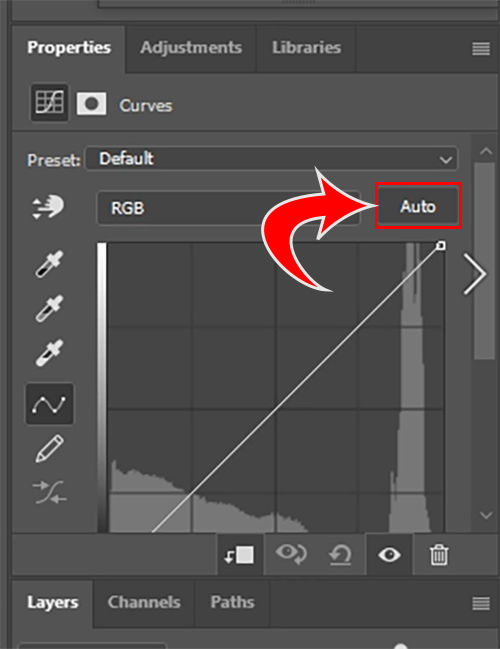
- Hold Alt (Windows) or ⌘ Command (Mac) key and press the Auto button.
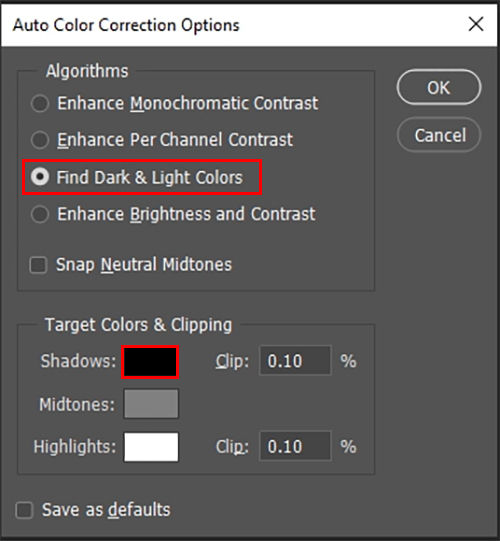
- Select Find Dark & Light Colors.
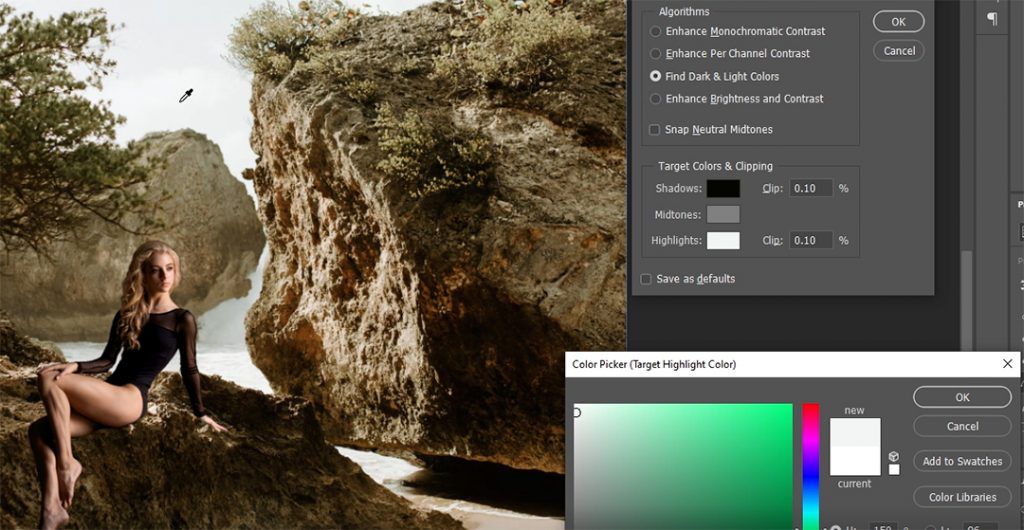
- Double-click the Shadows swatch.
- Select the darkest colors in the background.
- Double-click the Highlights swatch.
- Select the lightest colors in the foreground.
- Hit the OK Button.
- Hit No.
- Select your person layer.
- Click the Adjustment Layer icon at the bottom.
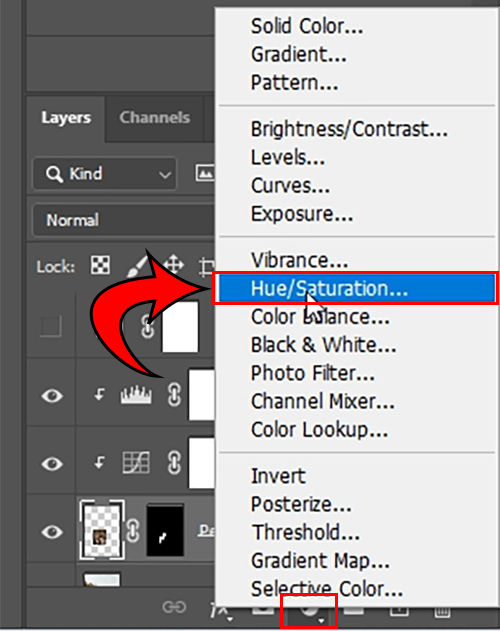
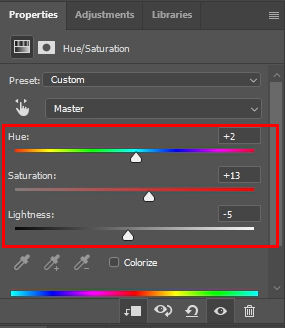
- Click Hue/Saturation.
- Adjust the Hue, Saturation, and Lightness sliders until your foreground and background image match.
That’s the process for Photoshopping someone into another photo. You might want to do more editing to add some final touches. Remember, it helps to start with a well-lit photo of a person against a background that contrasts with them.
For more Photoshop walkthroughs, see our Photoshop Section.


