How to Make Dotted Lines in Photoshop 2022
Learn how to make dotted lines in Adobe Photoshop 2022 in a few easy-to-follow steps.

Adobe Photoshop is a powerful photo editing tool with tons of capabilities. With so many options, it can sometimes be difficult to figure out how to do simple things. Take dotted lines, for example. It sounds simple in theory, but figuring it out can be challenging for beginners! In this guide, we will show you the easiest way to make dotted lines in Photoshop 2022.
How to Make Dotted Lines in Photoshop 2022
Here’s how to make a dotted line in Photoshop 2022:
- Create a new document or open an existing one (Ctrl+N).
- Create a new layer (Shift+Ctrl+N).
- Select the Brush tool (B key).
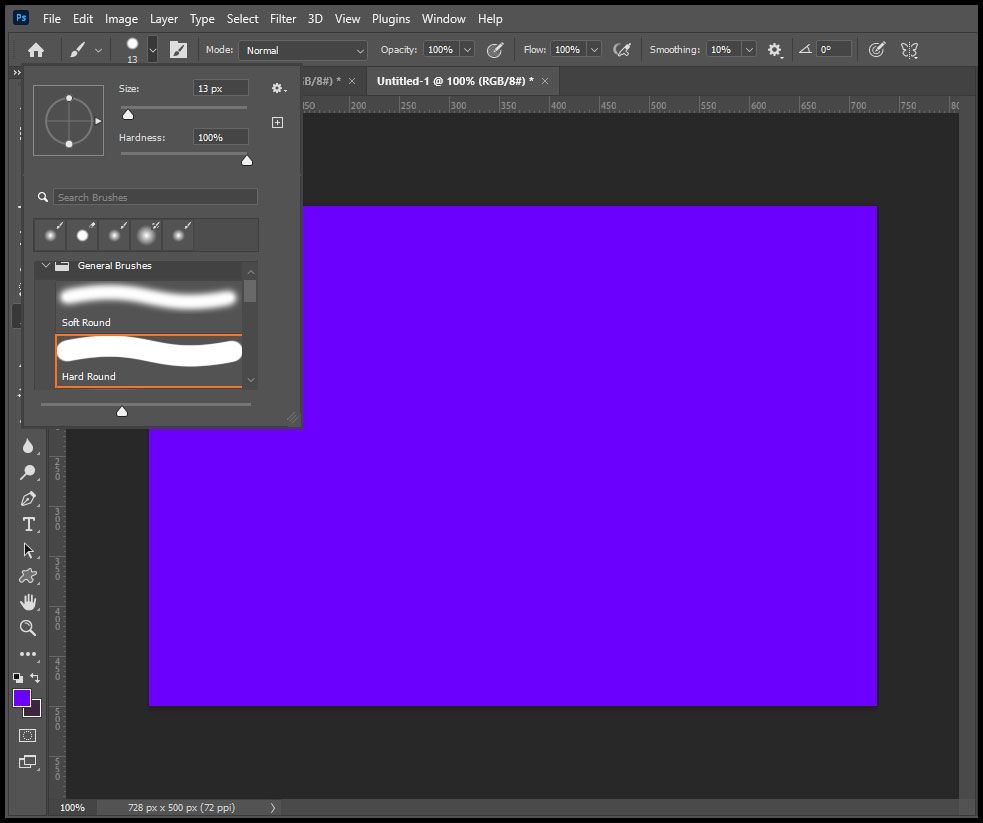
- Open the Brush preset picker.
- Select brush size, and use a 100% hardness.
- Select the Hard Round Brush.
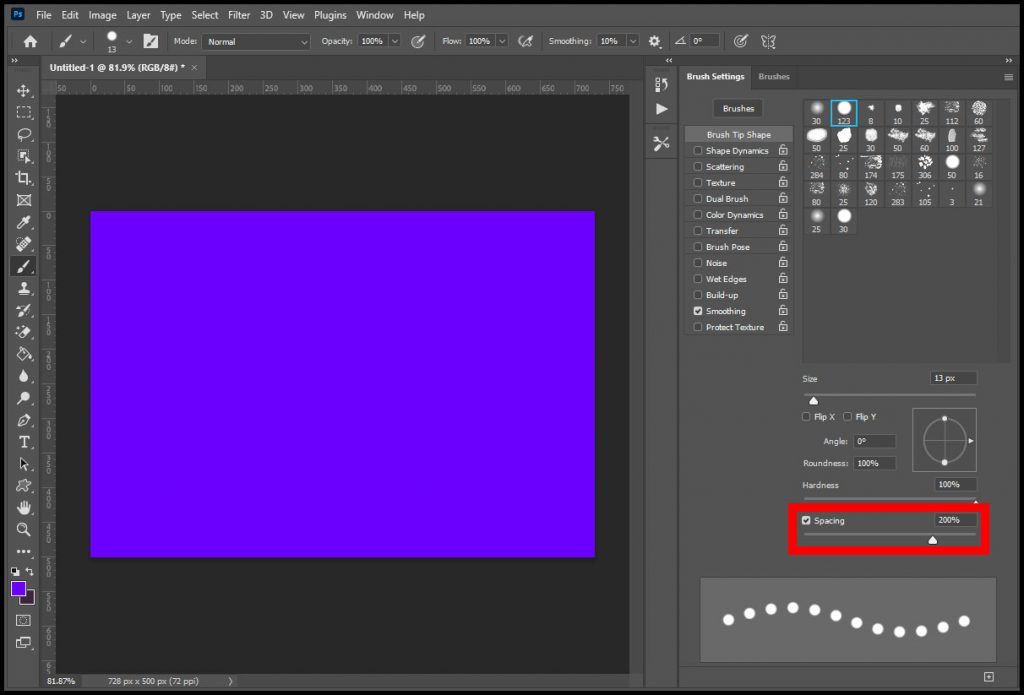
- Open the Brush window (F5 key).
- Select Brush Tip Shape, and change the Spacing to 200%.
First, you can create a new document or open an existing document on which you would like to draw a dotted line. Create a new layer by pressing the new layer button on the layers window or pressing the Ctrl+Shift+N keys.
Next, select the Brush tool by pressing the B key. On the top menu, you should see a brush icon with a down arrow next to it. Click on the down arrow, select your brush size, set the hardness to 100%, and double-click the Hard Round brush.

Next, open the Brush Settings window by pressing the F5 key on your keyboard. The Brush Tip Shape menu should be highlighted by default. Look to the bottom right of the window, and check the Spacing box. Drag the spacing slider to your desired amount. Increasing the Spacing to 200% will result in evenly spaced dotted lines.

You can then draw on your new layer with the Brush tool in any desired color you like and get a dotted line.

The process outlined above is the simplest way to make dotted lines in Adobe Photoshop 22.


