How to Type Does Not Equal Sign On Keyboard in Windows
Looking for a quick and easy way to type the does not equal sign on keyboard in Windows? See below for our guide.

Certain characters don’t exist on a traditional keyboard. This can make it annoying to type special characters like the does not equal sign on the keyboard in Windows. Luckily, there are a few simple solutions you can take to quickly type the does not equal sign.
If you’re in a rush, you can bookmark this site and copy and paste the symbol here: ≠
How to Type Does Not Equal Sign On Keyboard in Windows
To type the does not equal sign on the keyboard in windows, search for “Character Map,” then search for “does not equal.” Then, you can copy and paste the character. Alternatively, you can press and hold the shortcut Alt + 8800 on your keyboard to create the does not equal sign.
See below for step-by-step instructions on both methods.
Method 1: Using the Character Map
To use the Character Map to type the does not equal sign:
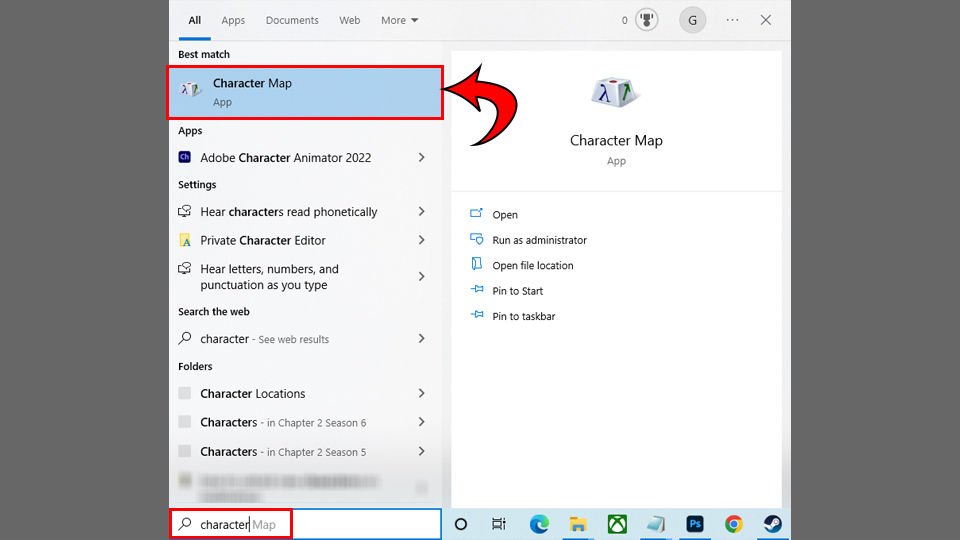
- Type
Character Mapin Search in your taskbar and click it.
- Check off Advanced view.
- Type not equal and hit Search.
- Double-click the does not equal sign.
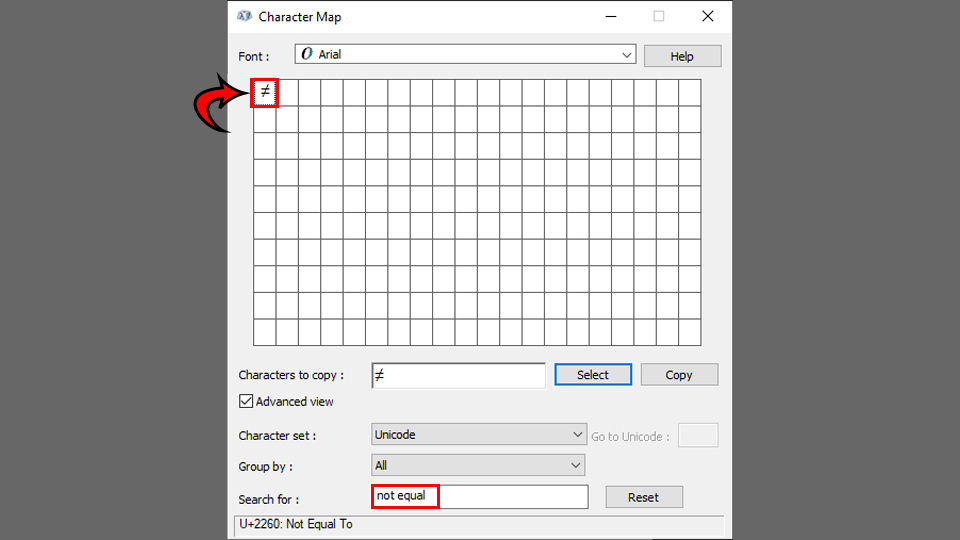
- Paste it with CTRL+V or right-click>paste.
Method 2: Using the Keyboard Shortcut
To use a keyboard shortcut to type the does not equal sign:
- Open your text document.
- Hold the ALT key.
- Press 8800 on your Numpad.
Using this quick shortcut will create the ≠ symbol in whatever document. You must use your Numpad, or this won’t work. If you’re using a keyboard that doesn’t have one, use the first method mentioned in this article.
And there you have it! Those are two methods you can use to create the ≠ sign in Windows.
For more Windows guides, see our Windows Section.


