How to Take a Full Page Screenshot in Google Chrome
Imagine that you are on a website and you want to take a full-page screenshot. There is information on the page below your scroll point, so you can’t just use a snipping tool to drag across your whole screen. Not many people know this, but Google Chrome has a built-in feature that lets you take a screenshot of an entire webpage. Let’s take a look at how to take a full page screenshot in Google Chrome.
How to Take a Full Page Screenshot in Google Chrome
The cool thing about this feature is that you don’t need to download or install any extensions. If you have an updated version of Chrome, you can use this feature anytime.
- Open Chrome Developer Tools
To open Chrome Developer Tools use the following shortcuts on your keyboard.
Alt + Command + I (Mac)
Ctrl + Shift + I (Windows)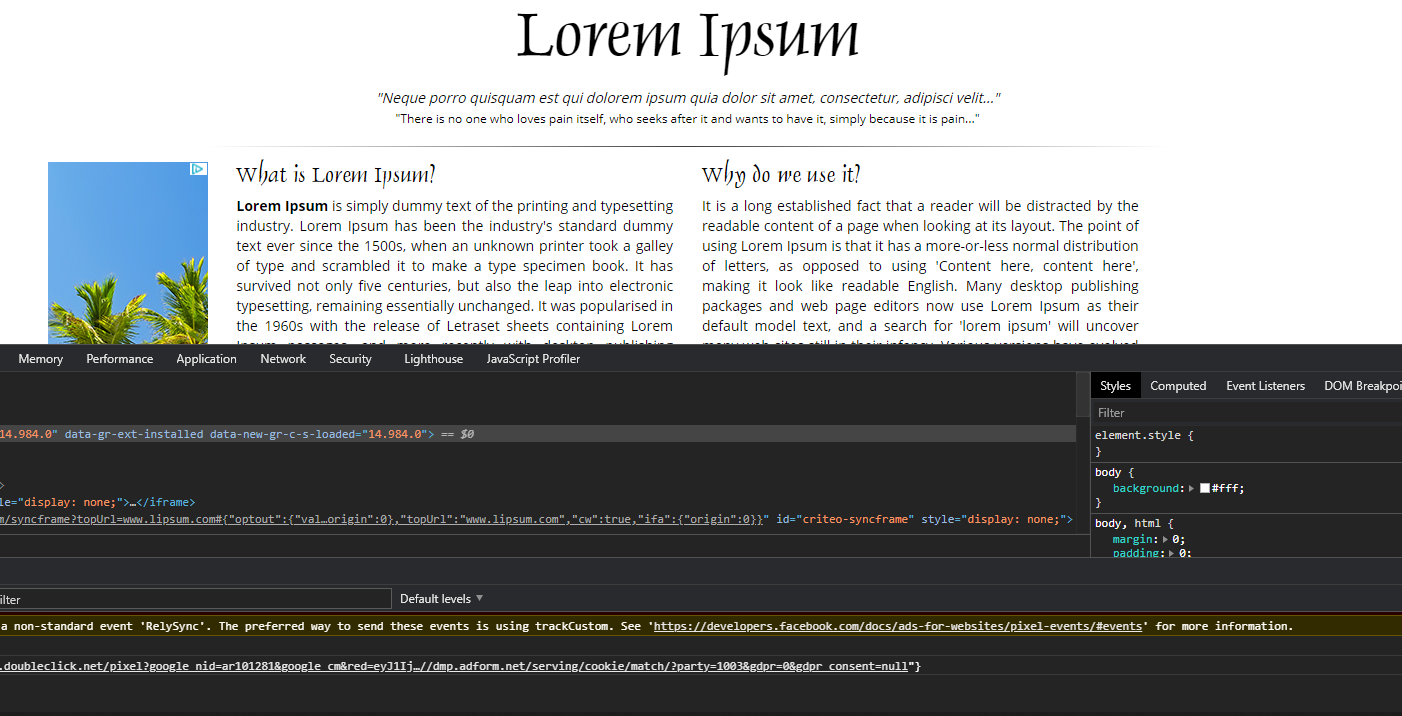
- Open the Command Menu
Once your developer tools menu is up. Open the command menu with the following shortcuts.
Alt + Command + P (Mac)
Ctrl + Shift + P (Windows)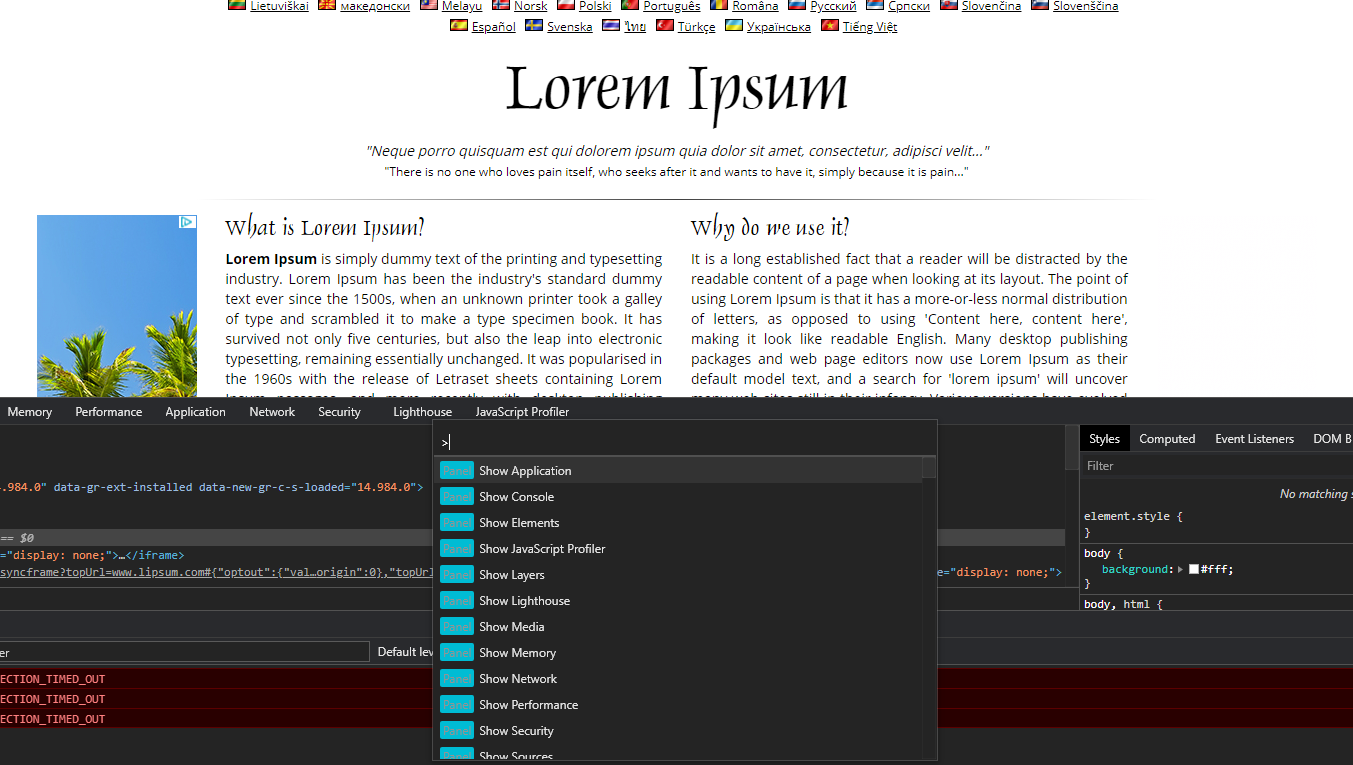
- Type Screenshot Command
Start typing “Full Screenshot” the command menu will autocomplete with “Capture full size screenshot“
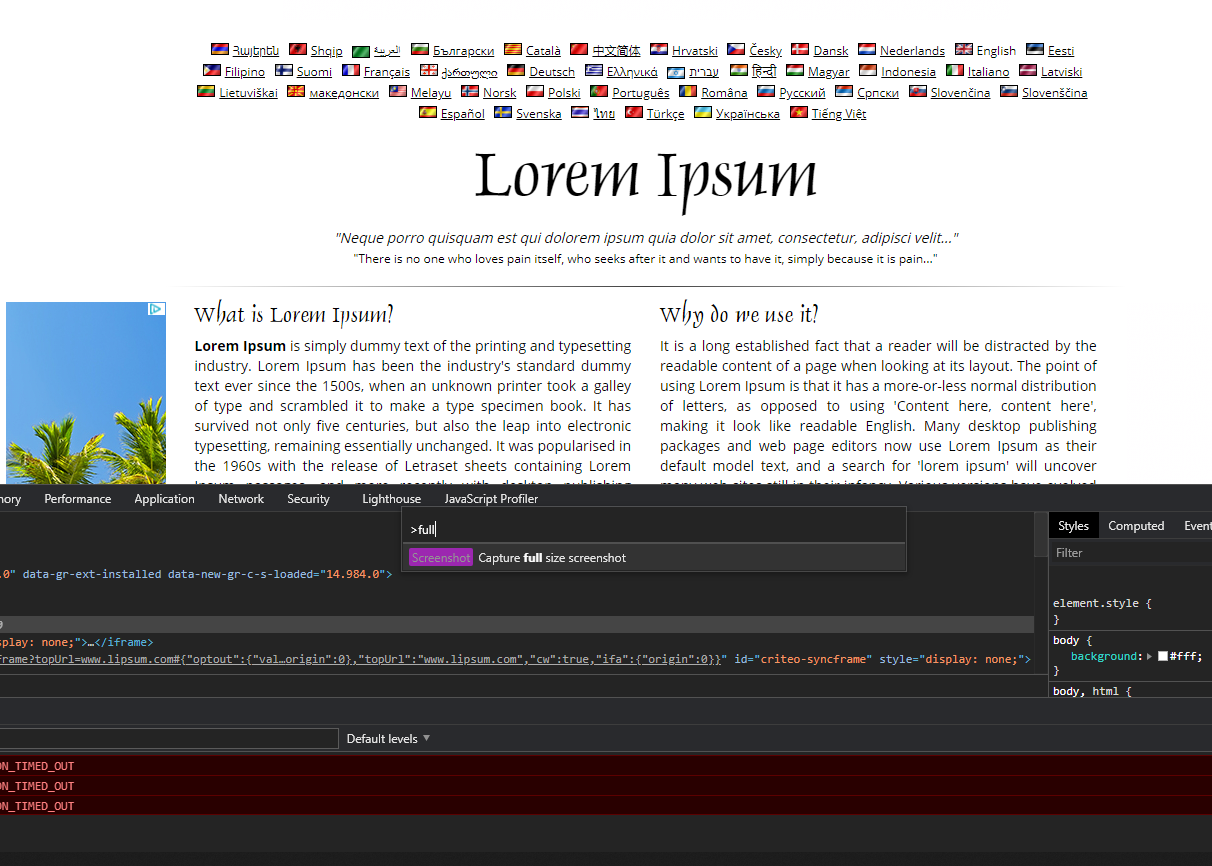
- Take your Screenshot
Click on “Capture full size screenshot” to take your screenshot.
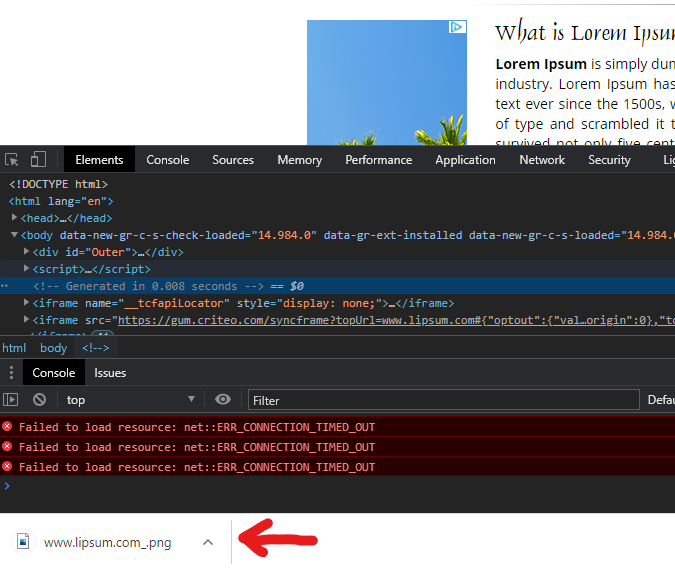
A screenshot will be taken automatically and saved to your Download folder. This capability isn’t very obvious, especially to users that don’t use the Chrome Developer Tool much or at all. But this feature is super handy. It’s excellent for long text-heavy websites and will save the very time-consuming process of taking multiple screenshots and compiling them into one image. Now that you know how to take full page screenshots with Google Chrome, feel free to play around with some of the other cool commands and functionalities Chrom Developer Tools provides.


