How to Save As SVG in Photoshop
Follow these steps to find out how to save a file as SVG in Photoshop, and what to do if the option doesn’t exist for you.

SVG is a preferred file format for logos and graphics due to its small file size and ability to be scaled without losing quality. Generally, SVG files are primarily used in Adobe Illustrator, one of the most popular vector graphics editors. However, you can also use them and export them in Photoshop. This guide will show you how to save files as SVG in Photoshop.
How to Save As SVG in Photoshop
To save as SVG in Photoshop:
- Open a file in Photoshop that you want to save as SVG.
- Go to File, Export, and Export As.
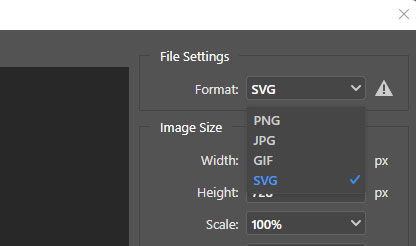
- On the Export As window, find the File Settings section.
- Click on the dropdown menu next to Format and choose SVG.
- Click Export.

Congratulations, you successfully exported your image as an SVG file. But wait, there’s a potential issue.
You may have followed the steps above and are now wondering, “why is there no SVG option in Photoshop Export As?” Don’t worry; this is a common problem, and we’ll show you how to fix it.
If you do not see the SVG option in Export As, click cancel on the Export As window. We’ll need to enable Photoshop’s legacy “Export As” functionality.
To enable Photoshop’s legacy “Export As” follow the steps below for your operating system.
How to Enable Photoshop Legacy Export As on PC
- Click File on the top menu.
- Go to Export and then Export Preferences.
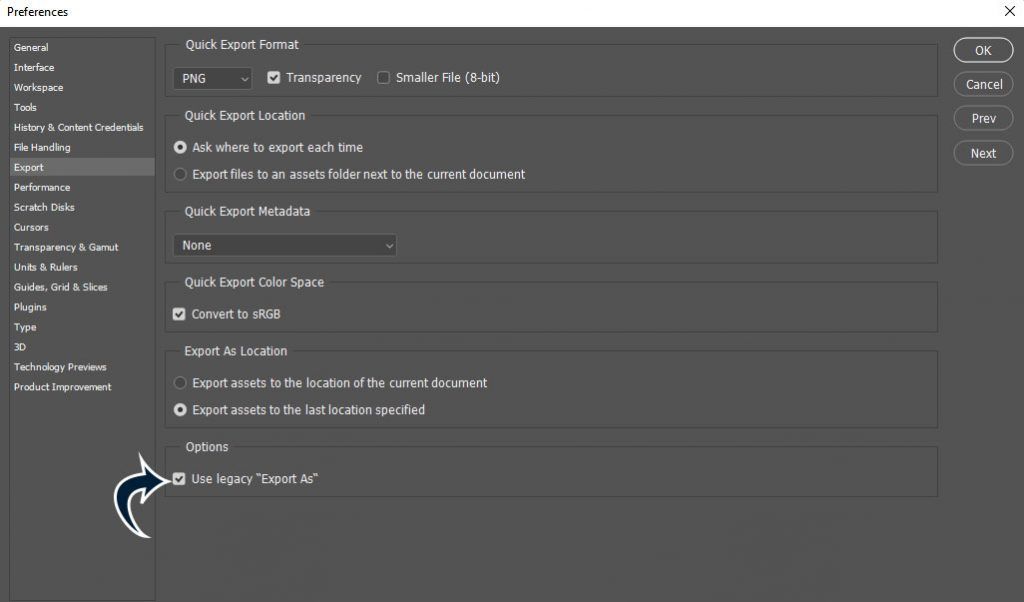
- Under Options, check “Use legacy “Export As.”
- Click OK.
How to Enable Photoshop Legacy Export As on macOS
- Click Photoshop in the top menu.
- Go to Preferences and then Export.
- Under Options, check “Use legacy “Export As.“
- Click OK.
After enabling Photoshop Legacy Export As, you can refollow the steps above. You should now see the SVG Format in the dropdown menu under File Settings.

For more tutorials and walkthroughs, check out our Photoshop section.


