How to Remove Fly Away Hair in Photoshop
Are you trying to get rid of those pesky fly away hairs? Here’s a quick and easy tutorial on how to remove fly away hair in Photoshop.
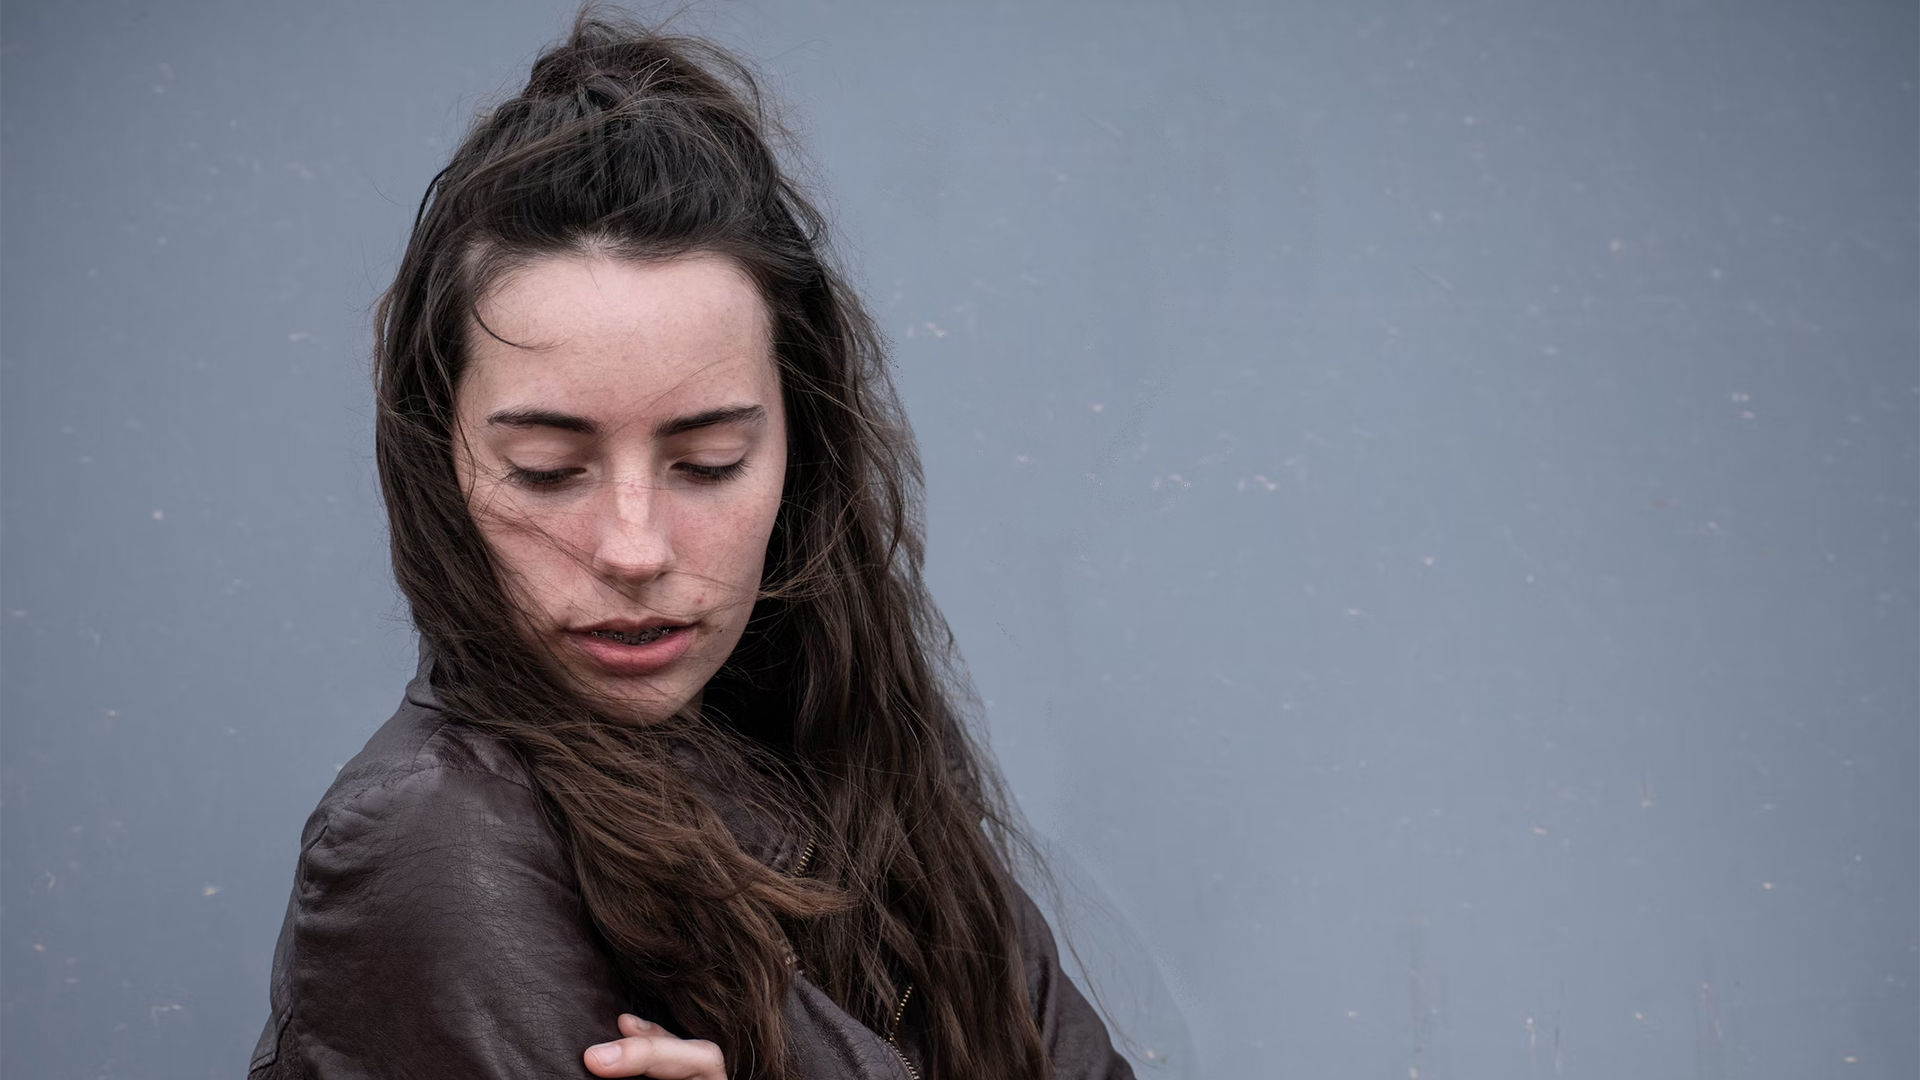
Fly away hair, or flyaway hairs, are wispy hairs in high-resolution images. Luckily, Photoshop masters have discovered an easy way to get rid of them to give the model’s hair a smoother appearance. Here’s how to remove fly away hair in Photoshop.
How to Remove Fly Away Hair in Photoshop
To remove fly away hair in Photoshop:
- Create a new layer and name it New.
-
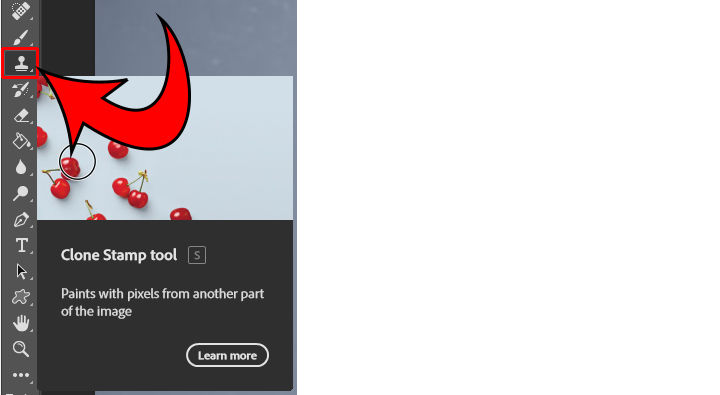
Click the Clone Stamp tool on the left toolbar.
- Set the Opacity and Flow to 100%.
- Set the Sample to Current & Below.
-
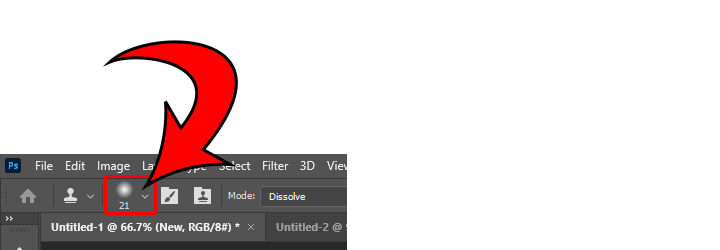
Click the Brush icon in the top toolbar and set the brush Hardness to 0%.
- Hold Alt (Windows) or Option (Mac) and left-click the background.
- Zoom into your image.
- Left-click over the flyaways to remove them.
-
Click the New layer and click the Mask icon at the bottom of the Layers tab.
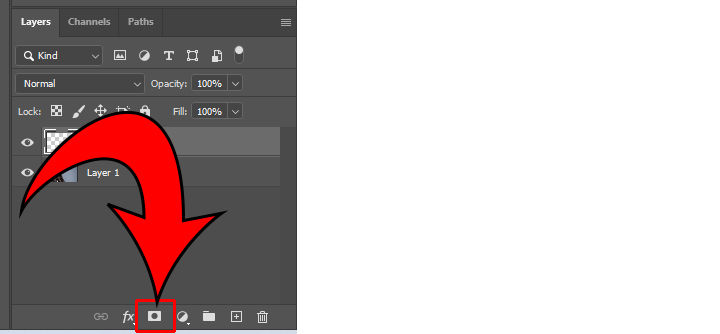
- Set your foreground color to black.
-
Paint the edges of the hair back in.
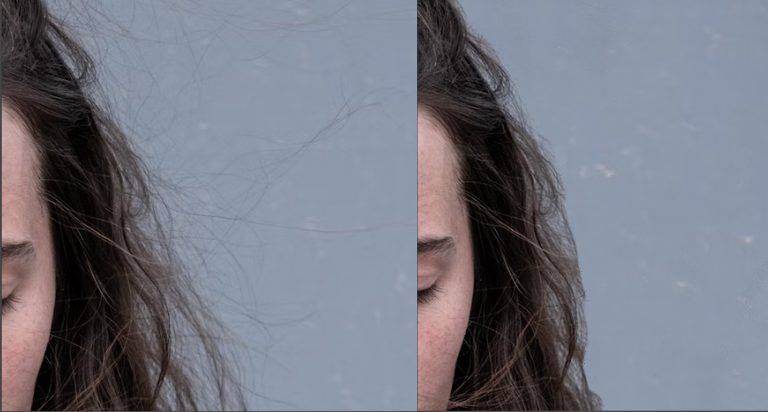
And there you have it! That’s a quick tutorial on removing fly away hair in Photoshop.


