How to Get Chat on Screen in OBS (Updated 2022)
Communities love it when they are featured on a stream. Getting chat on screen in OBS is critical if you’re using it. Read this to learn how.
Having your chat on screen is a great way to engage your audience. It’s the primary way streamers get a big community and following. However, OBS can sometimes be a bit confusing. Here’s how to get your chat on-screen in OBS updated for 2022.
How to Get Chat on Screen in OBS (Updated 2022)
Getting your chat in OBS is simple. In essence, you must create a new window and then attach a source to the chat window. Regardless of what streaming platform you use–the steps are similar. Pop out your chat, capture it in a window in OBS, and there you have it.
Getting Chat on Screen in OBS with Twitch
This method does not use any other apps other than OBS. Here’s how to get your chat on-screen in OBS with Twitch.
- Log into your Twitch.tv account.
-
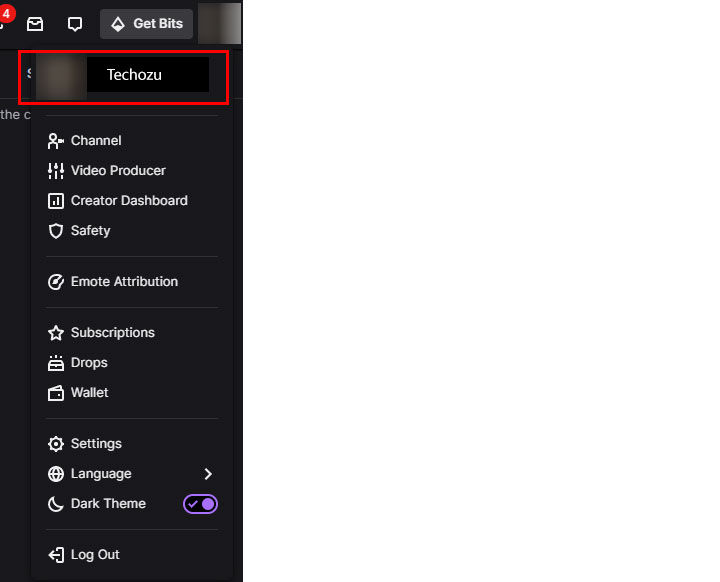
Click your profile picture in the top right of the screen.
-
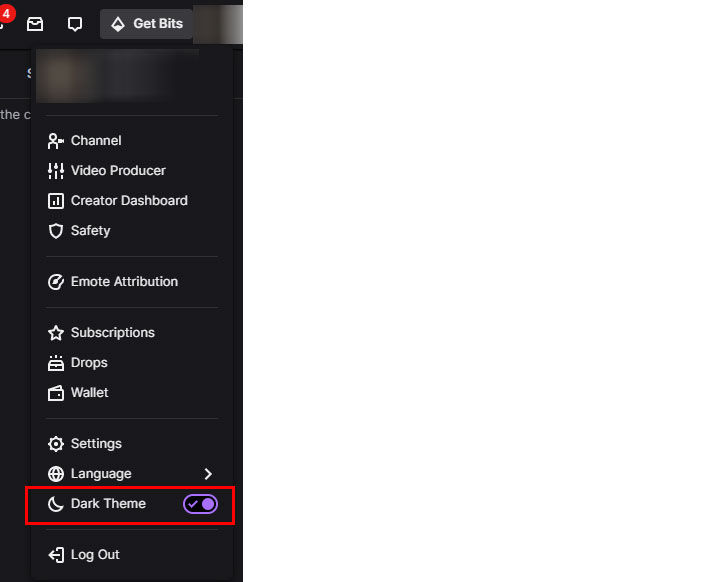
Toggle on Dark Theme.
-
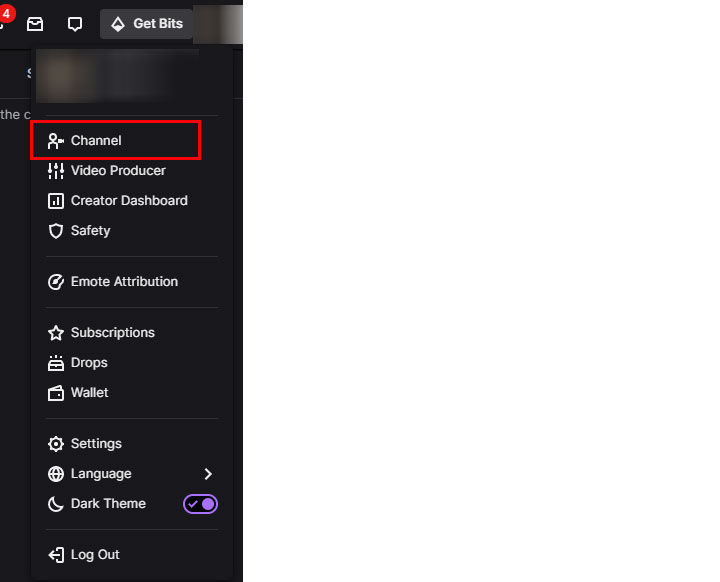
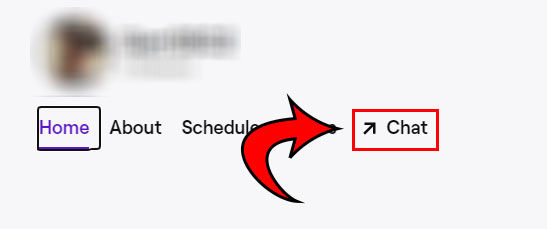
Click Channel.
-
Click Chat.
-
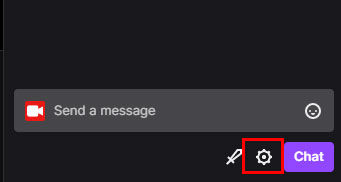
Hit the settings icon at the bottom of your chat.
-
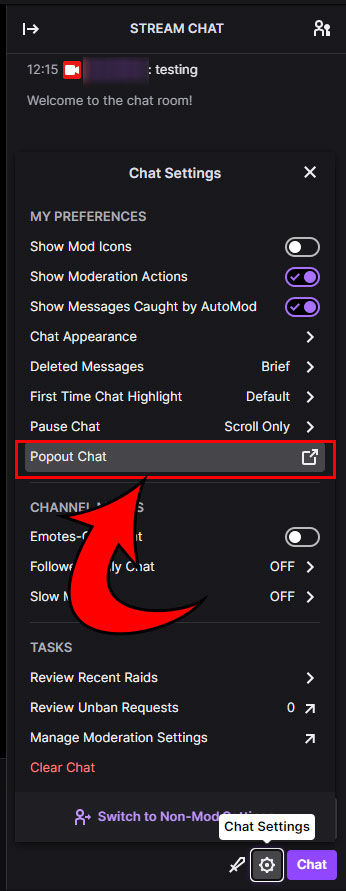
Click Popout Chat.
-
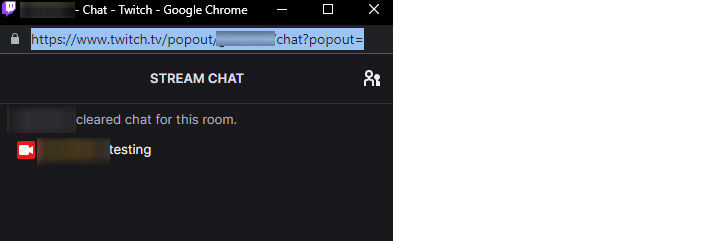
Copy the URL from your chat.
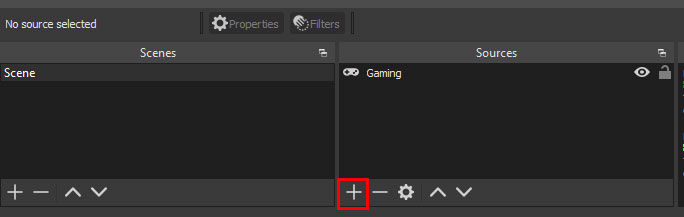
- Open OBS.
-
Click the + sign under Sources.
-
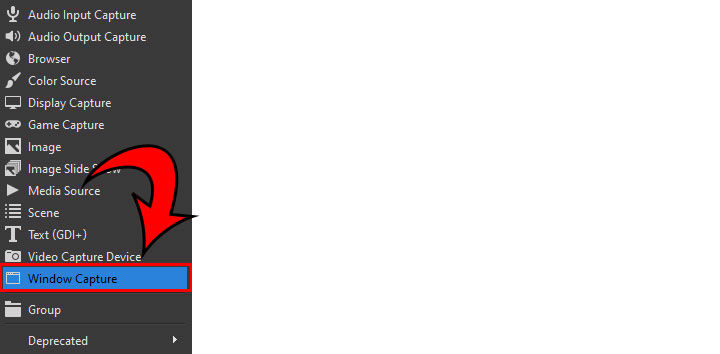
Hit Window Capture.
-
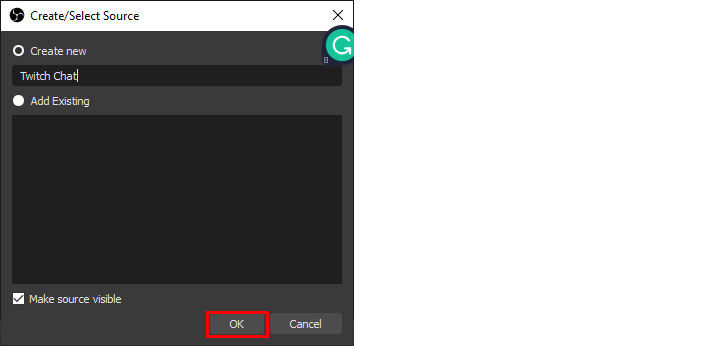
Name your chat “Chat” or “Twitch Chat” and hit OK.
-
Select the Window for your chat. It should have “Chat – Twitch” in it.

- Hit OK.
And voila! There you have it. You’ve now successfully added your chat to your OBS. You can move the window around depending on your preferences and make it bigger or smaller. Hold ALT and slide the edges of the window to crop it.
Getting Chat on Screen in OBS with YouTube
If you use YouTube Gaming as your streaming platform of choice, the directions are very similar to the Twitch directions except you pop out your chat in a slightly different way. Here’s how:
- Login to your YouTube channel.
- Click the three lines in the top right of your chat.
- Click Popout Chat.
- Open OBS.
- Click the + sign under Sources.
- Hit Window Capture.
- Name your chat “Chat” and hit OK.
- Select the Window for your chat. It should be the URL for your YouTube chat.
Making Your Chat Window Transparent in OBS
If you don’t want the borders or background in your chat, it’s understandable and straightforward to do. Follow the simple steps below to accomplish this.
- Right-click the window for your chat.
- Click Filters.
- Click the + sign on the bottom left of the screen.
- Click Color Key.
- Name it “Transparent Chat”
- Under Key Color Type, click Custom Color.
- Click Select Color.
- Click Pick Screen Color and click on your chat window.
- Hold Alt and change the size of your chat window, if you prefer.
And there you go! Now you have a professional-looking chat with a transparent background.
Using an App to Display Chat
While we haven’t extensively used these apps, many integrate with streaming services and have built-in chat plugins. If you’re having trouble adding your chat after reading this article, here are a few of the most popular apps people use:
Now you can engage your audience better and they will be able to read the stream when they have their video maximized!
For more tech guides, head over to our Tech Section.


