How to Add Texture to Text in Photoshop

Photoshop is one of the most powerful photo editing apps in the world. It’s also great for creating digital images like flyers, posters, ads, thumbnails, etc. If you have an image with text and want to spice up the text a bit, you can do so by adding texture. In this guide, we’ll show you how to add texture to text in Photoshop.
For this method, we’ll take a picture of a brick wall and apply it to a text layer. So, to get started, make sure you have a picture of something textured (like grass, sky, a brick wall, etc.) that you want to apply to your text. Save that image to your desktop, as we’ll use it in the guide.
How to Add Texture to Text in Photoshop
To add texture to text in Photoshop:
- Create a new image in Photoshop (Ctrl+N).
- Using the Text Tool (T), write some text on a new layer.
- Find an image that contains a texture you want to use.
- Drag the textured image into your document and label the Layer “Image.”
- In the Layers window, right-click the Image layer and select Create Clipping Mask.
- The image layer should now have a down arrow, and the text layer should be underlined.
- Select the Image layer
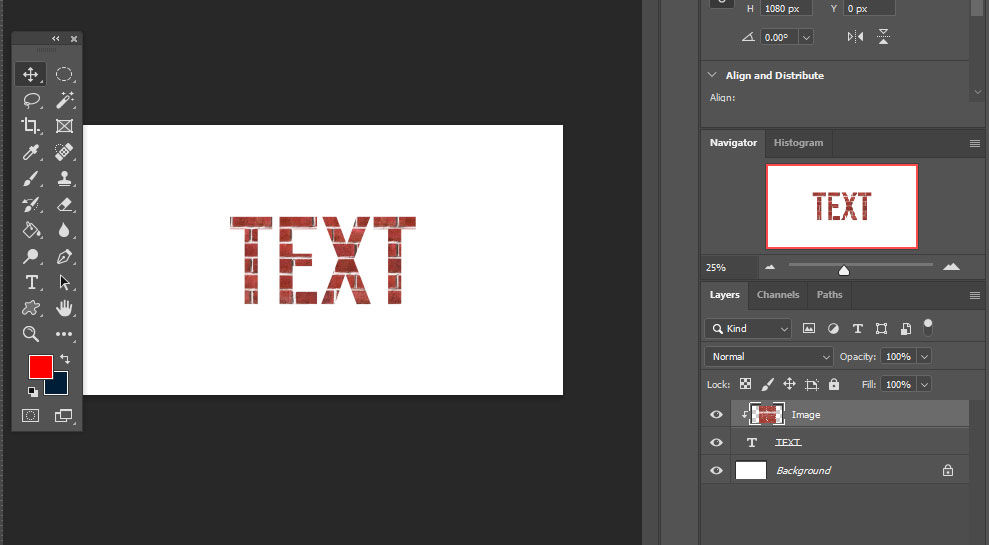
Voila, your clipping mask on the image layer makes the image only display within the outline of the text on the layer below it. You can free transform the image by selecting the image layer and going to Edit > Free Transform to adjust the image size. That’s one simple way to add texture to text in Photoshop.
For more walkthroughs and guides, check out our Photoshop section.


