Generating SSH Keys in Windows
Learn to easily make SSH key pairs using either PuTTy or the OpenSSH Client on Windows 10 or 11.

Don’t let SSH keys confuse you. They are nothing more than two strings of text that match up together. You will need to generate them multiple times throughout your career, and the process is very simple. If you are working on Windows, this guide will be specifically for you. By the end, you will have two different methods for generating SSH keys on Windows.
Using PuTTy To Generate an SSH Key
PuTTy is one of the most popular SSH clients for Windows. We use it as our primary terminal, so we like to generate SSH Keys using it. The process isn’t complicated, but some procedures aren’t entirely intuitive.
Download Putty
- You can install the complete PuTTy package, or if you want to generate an SSH key without installing the client, download puttygen.exe from the “Alternative binary files” list.
Open the PuTTy Key Generator (puttygen.exe)
- Either open the puttygen.exe file you downloaded or search for puttygen by hitting the windows key if you installed the complete PuTTy package.
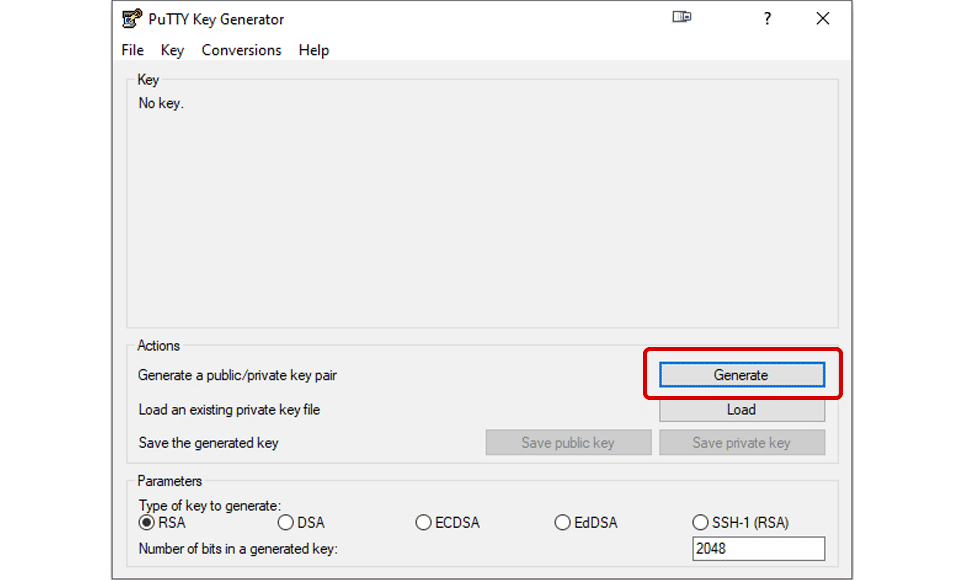
Click Generate
Before clicking generate, you can choose your key type at the bottom under Parameters. Your choices are RSA, DSA, ECDSA, EdDSA, and SSH-1 (RSA).
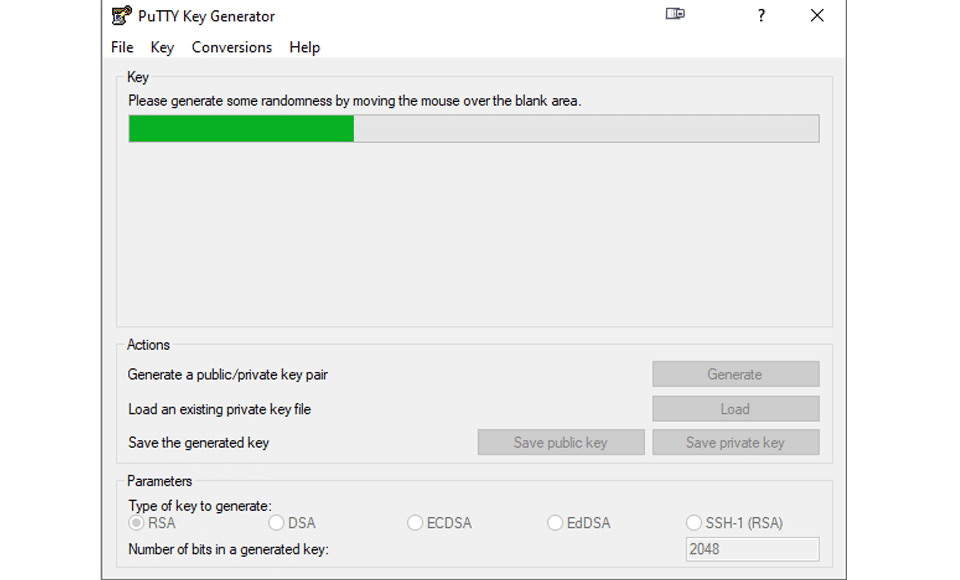
- Once Generate is clicked, move your mouse around randomly in the box above the button. A green progress bar will begin to fill.
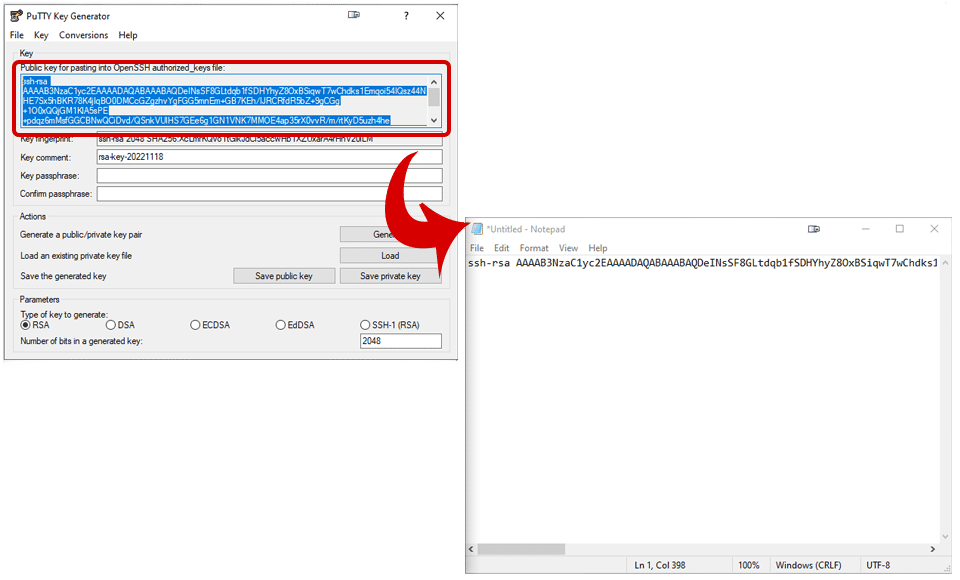
Save the Public Key
- Once the key is generated, select and copy the Public key from the top text box. Open notepad, paste the key, and save it with any filename you like, [FILENAME].pub is a good standard to use.
Save the Private Key
- At the top, click on Conversions and then Export OpenSSH key. When asked to save the key without a passphrase, click Yes. Save the file in a [FILENAME].pk format or any other format you wish.

Your public and private key filenames and extensions can be anything you like. These are just simple text files. Make sure to distinguish your private and public keys, however.
Using OpenSSH To Generate an SSH Key
Another way to create an SSH key is to use the ssh-keygen command part of the built-in Windows OpenSSH client.
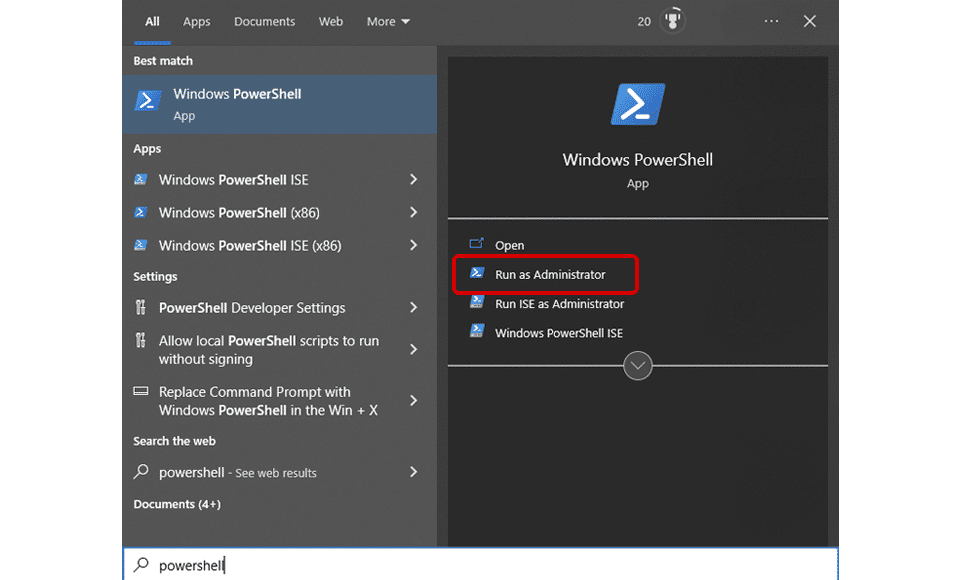
Open Powershell
- Hit the Windows key and search for “Powershell.” Right-click and click Run as administrator.
Type ssh-keygen
- The keygen utility will allow you to name your key file. You can name it anything you want or leave it blank for the default “id_rsa” value. When asked for a passphrase, you can leave that blank and hit Enter.
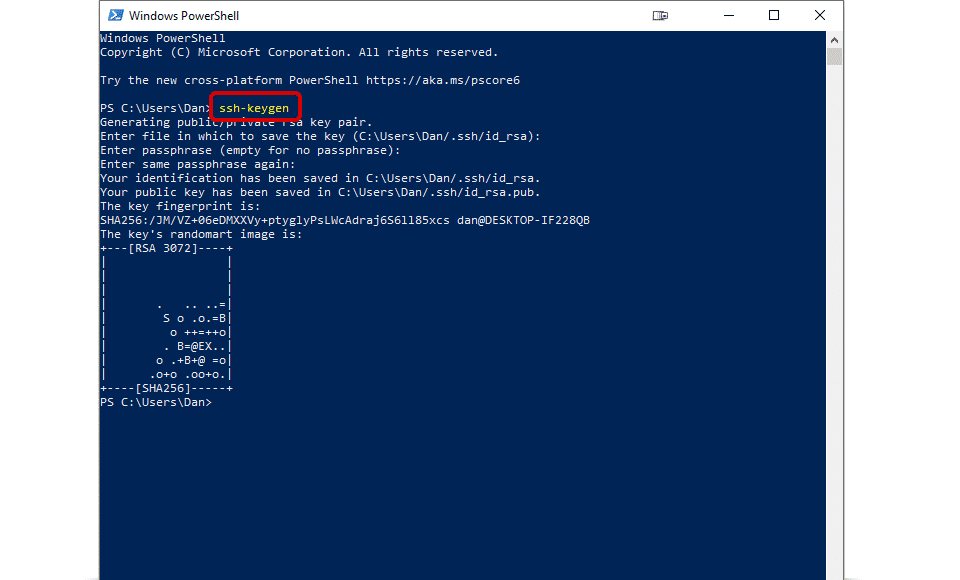
Find your keys
- Once complete, navigate to C:\Users\[USER]\.ssh, and you should see two files. The file with the .pub extension is your public key, and the file with no extension is your private key.
Help ‘ssh-keygen’ is not recognized
If you get an error similar to the following:
The term ‘ssh-keygen’ is not recognized as the name of a cmdlet function, script file, or operable program.
or
‘ssh-keygen’ is not recognized as an internal or external command
You need to ensure the OpenSSH client is enabled for your Windows installation. Follow these steps to get it fixed.
- Hit the Windows Key.
- Type and Click on “Apps & Features“.
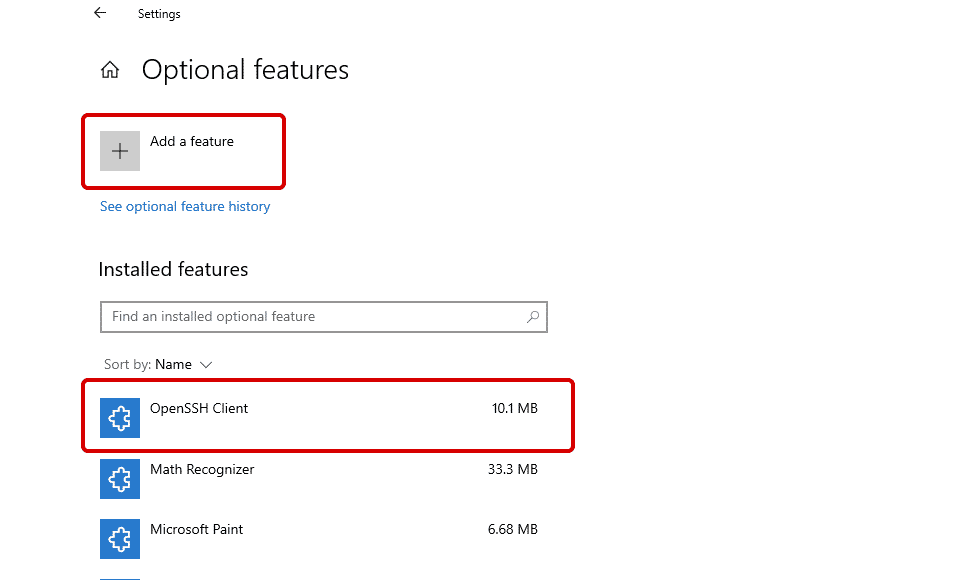
- Click Optional features.
- Click Add a feature.
- Search and Select “OpenSSH Client“.
- Click Install.
The ssh-keygen command should now be available in your command prompt and PowerShell terminal.
If ssh-keygen is still not available, perform a restart.
How to Use SSH Keys
Once generated, using SSH keys is very simple. The public key is the key you will give public systems you will be connecting to. The private key will remain on your computer and match the public keys. You can imagine it as if the public key is a padlock you put on a gym locker, and you keep the key that opens it in your pocket. You are the only one with that key, so only you can open the padlock.
Let’s look at an example when connecting to a Digital Ocean droplet using PuTTy.
You will be asked to provide an SSH Key when creating your Digital Ocean droplet. This is the public key you generated above. Copy and paste this key in the prompt when asked.
When connecting to your new server in PuTTy, enter your server information. Under the Connection->SSH->Auth section, find the Private key file for authentication prompt, click Browse and navigate to the private key file that corresponds to the public key you provided DigitalOceans.
Wrapping Up
We hope you now have a better understanding of SSH keys and how to generate them on Windows. You can use either the PuTTy or OpenSSH Client method make sure to keep your private and public key filenames distinct. Good Luck!
For more useful Windows guides, check out our Windows Section.


