How to Create Labels in Word
Looking to create labels in Microsoft Word? Check out this step-by-step guide from our experts.
There are many ways to create labels in Microsoft Word. You can use the Mailings tab, the Envelopes and Labels dialog box, or even create your own labels from scratch. In this article, we’ll show you how to create labels in Word using all three methods.
How to Create Labels in Word
The easiest way to create labels in Microsoft Word is by using the Labels section.
Here’s how to create labels in Microsoft Word:
- Open a new document in Microsoft Word.
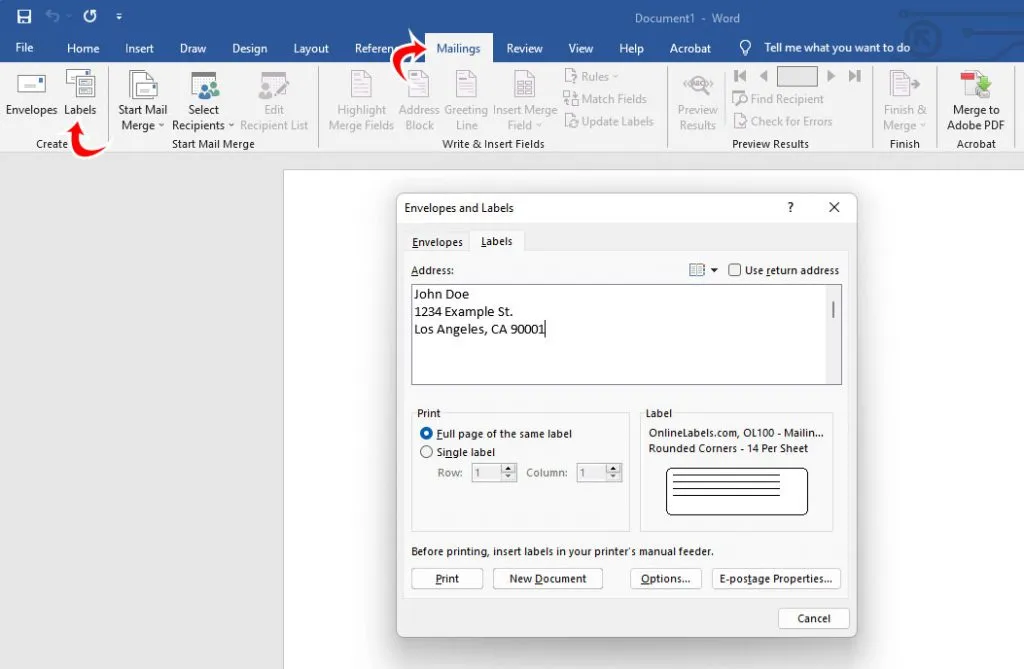
- Open the Mailings tab from the top ribbon.
- Click on Labels.
- Enter the Delivery Address and select a Font.
- Click on Options and choose your Label vendor and Product number.
- Click New Document or OK to see a preview of your labels.
- Customize labels in the Table Design and Layout section from the top ribbon.
- Print your labels when you are satisfied with them.
There are a number of ways to customize labels in Word. The main things to pay attention to are the text alignment, font type and size, and color. A darker color, like black, is always a good font color for labels, especially if the label background is white.
Which Font Should I Use for Labels?
When selecting a font for labels, make sure it is an easily legible font. Here are some font examples you could use for labels:
- Calibri
- Garamond
- Georgia
- Helvetica
- Open Sans
That’s how to make labels in Microsoft Word, and some font choices you can use to make them look nice.


