How to Fix One AirPod Not Working
Here are a few things you can try to fix one AirPod not working or sound only playing in one ear of your Apple earphones.
AirPods are a popular brand of wireless earbuds for iPhone users, thanks to the high-quality hardware Apple can provide. No matter how good the headphones are, you will inevitably encounter some problems. One of the most annoying things is when the sound only works in one ear. If you’re having this issue and can’t figure it out, you can follow our guide below on how to fix one AirPod not working.
How to Fix One AirPod Not Working
To fix one AirPod not working, you can try:
- Reconnecting your AirPods
- Charging your AirPods
- Cleaning your AirPods
- Toggling Bluetooth on your device
- Fixing your audio balance
- Updating your operating system
- Resetting your AirPods
- Resetting your device settings
- Contacting Apple support
Reconnecting your AirPods
A common reason for an AirPod not working is a connection issue. Issues can show up if you use the same pair of headphones across multiple devices or use a different set of headphones on your current device.
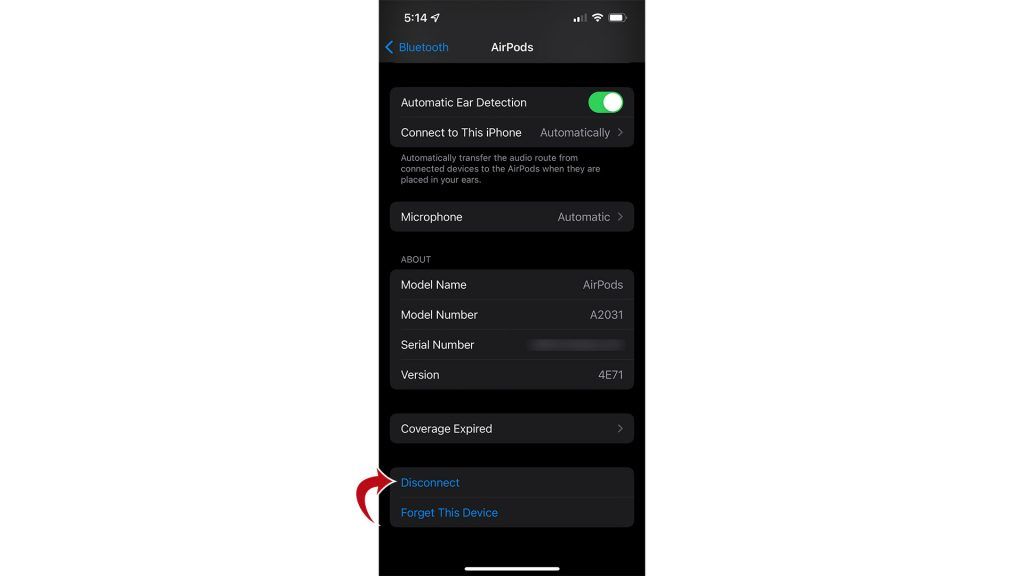
To reconnect your AirPods on an iPhone:
- Go into Settings.
- Go to Bluetooth.
- Tap on the “i” button to the right of the AirPods.
- Tap on the Disconnect option and confirm it.
- Go back to the Bluetooth settings.
- Reconnect your AirPods by tapping on them in the list.
Charging your AirPods
The most common reason why one AirPod may not be working is an insufficient charge. It is possible one earbud is low on power, and the other is not. To charge your AirPods, simply place them in the charging case. Try plugging the charging case into a charger as well.
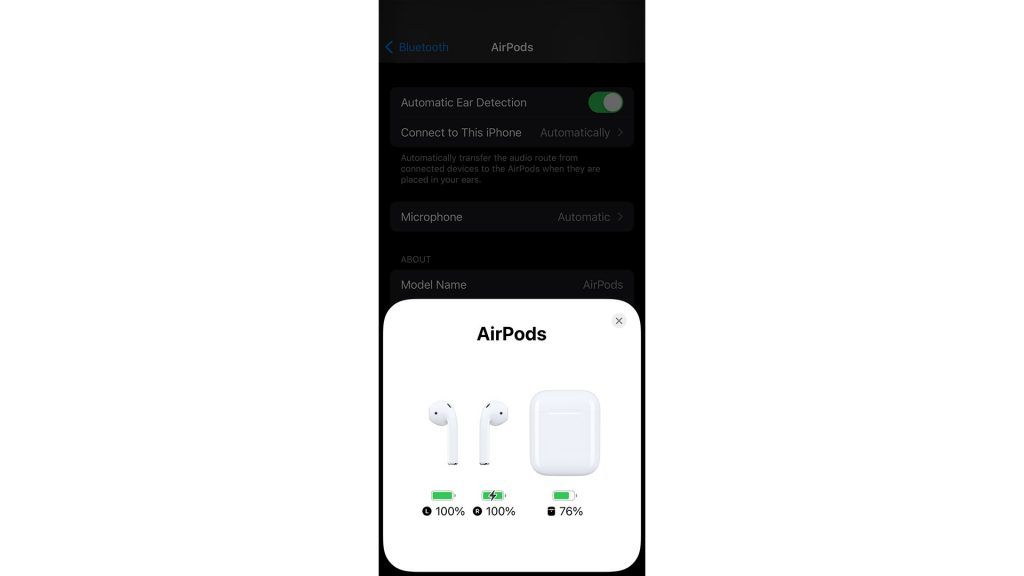
To check the battery level of your AirPods:
- Open the lid of the AirPods charging case.
- Place the AirPods in the charging case.
- Hold the charging case near your iPhone.
The battery level for the AirPods will pop up on your iPhone’s screen. If the battery level is low, let the AirPods charge. The charging case takes about one hour to charge, and the AirPods should take about 20 minutes to charge. According to Apple, a five-minute charge for your AirPods will get you around an hour of listening time.
Cleaning your AirPods
If one of your AirPods is not working, you should try to clean your AirPods thoroughly. Debris, oils, and other gunk can clog the AirPods, which can make them less effective in some cases. To clean your AirPods, use a soft, lint-free microfiber cloth and wipe them clean. You can use a damp cloth, but be sure not to get any water in any opening.
Remember to clean the charging case. A damp cloth with isopropyl alcohol is okay, but let your charging case dry upside down after cleaning. You can use the same soft, lint-free microfiber cloth to clean the case and some cotton swabs to get in the crevices. Never use a rough cloth or abrasive cleaners, and avoid putting things in the charging ports and on the metal contacts.
Toggling Bluetooth on Your Device
You can also try toggling your Bluetooth functionality on and off on your iPhone or other mobile devices. A simple reset of the Bluetooth settings could fix the problem. To turn off Bluetooth on an iPhone:
- Go into Settings.
- Tap on Bluetooth.
- Tap on the slider to the right of Bluetooth.
- Confirm the option to turn off Bluetooth.
- Toggle it back on again.
You can then reconnect your AirPods and try again.
Fixing Your Audio Balance
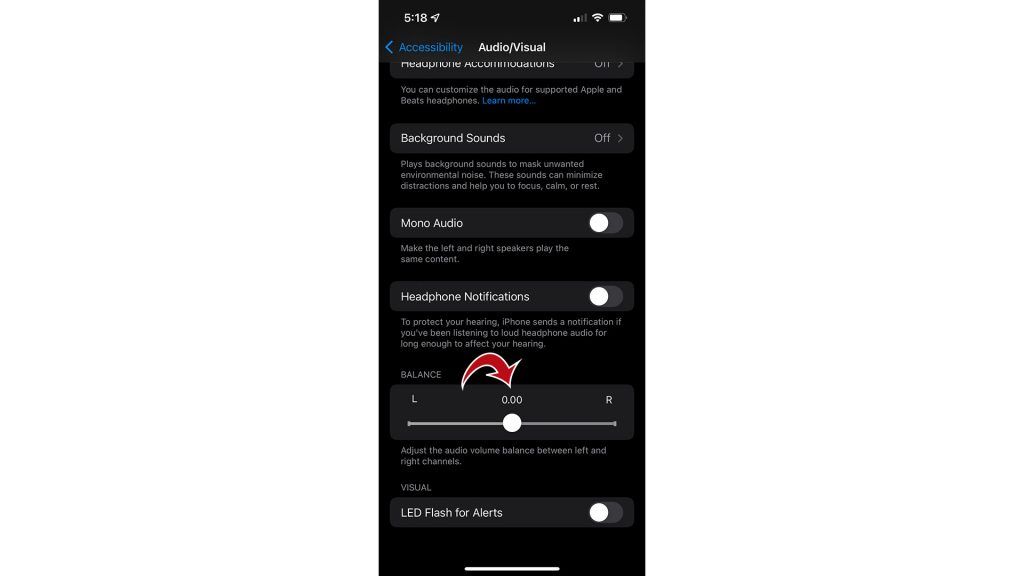
Here’s an uncommon solution to a common problem. If someone was tinkering with your phone, some accessibility settings might have been changed. Specifically, there is a setting called Audio Balance. The setting controls the audio volume balance between the left and right channels.
To change the audio balance on an iPhone:
- Go into Settings.
- Scroll down and tap on Accessibility.
- Tap on Audio/Visual.
- Set Balance to the middle (or to your preference).
Updating Your Operating System
Another easy way to potentially fix the issue is by updating your iPhone. There could be a pending update that somehow affects your AirPods. You never know, so it’s best to check for an update manually.
To update your operating system on an iPhone:
- Go into Settings.
- Tap on General and go to Software Update.
- Wait while the phone searches for updates.
- Download and Install any updates.
- Restart your phone if necessary.
Try your AirPods again after your phone is up-to-date.
Factory Reset Your AirPods
One final option to fix an AirPod only playing in one ear is factory resetting your AirPods. To factory reset AirPods and AirPods Pro:
- Place the earbuds in the charging case and close the lid.
- Wait one minute and open the lid of the charging case.
- Press and hold the setup button on the back of the charging case for 15 seconds until the light flashes yellow and then white.
- Reconnect your AirPods to your device.
Resetting Your Device Settings
One final option to fix an AirPod only playing in one ear is to reset your device settings. Note that when you reset your device settings, you will lose any customization you did to your phone, like brightness and video settings, audio settings, etc.
To reset your settings on an iPhone:
- Go into Settings and tap on General.
- Tap on the Reset button.
- Go to Reset All Settings.
Contacting Apple support
Lastly, you can contact Apple support if you cannot troubleshoot the issue yourself. Open the Apple support website, type in “AirPods,” and press Enter. Click on Audio & Sound, tap Continue, and click on the chat support button at the bottom of the page. You will need to sign in to your Apple ID to chat with someone for further assistance.
Next time your music is only playing in one ear of your AirPods, give some of the things above a try. And remember, if all else fails, try contacting Apple support for more assistance!
Check out our iOS section for more related tech and Apple guides.


