How to Record 1440p in OBS
If you want to capture high-quality video, you’ll want to learn how to record 1440p in OBS.
If you enjoy making videos on the internet, there may be a time when you want to upload the highest quality videos. However, you might be recording at 1080p. Luckily, there are ways you can adjust your settings to record at a high-quality 1440p resolution. Continue reading to uncover how to record 1440p in OBS.
1440p or Quad HD is actually 2560×1440 pixels at a 16:9 aspect ratio. It’s called Quad HD because it boasts 4x the pixels as High Definition or 720p. This might be why you notice a clearer picture with more refined edges when watching videos in 1440p.
How to Record 1440p in OBS
To record in 1440p in OBS, you’ll need to adjust your Video, Output, and Audio settings to the proper values. In addition, you’ll need the proper hardware capable of recording at 16000 Kbps, or 16 Megabits per second. See below for a step-by-step guide.
At a bare minimum, we recommend at least an RTX 2000 Series or AMD Radeon VII series or higher video card to record at 1440p at 60 FPS.
To record 1440p in OBS:
- Click File and select Settings.
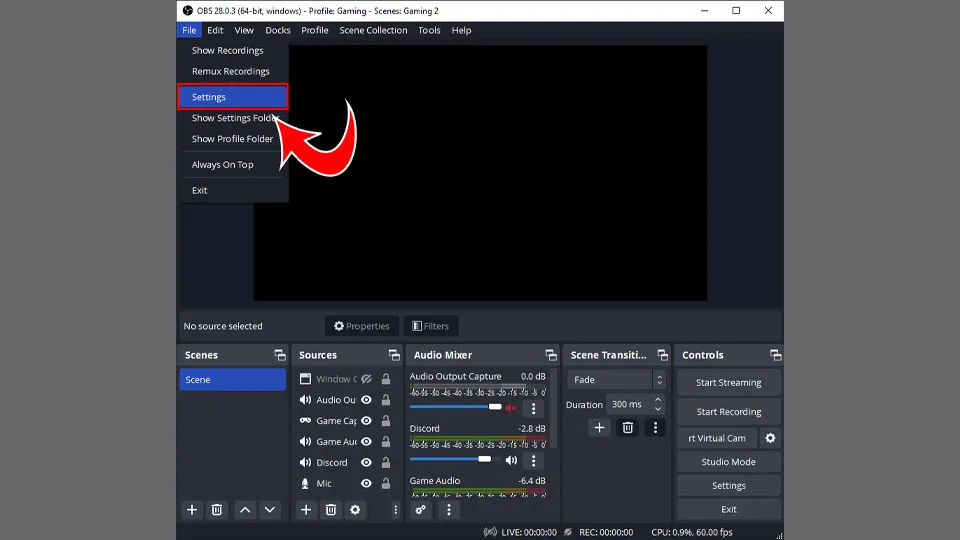
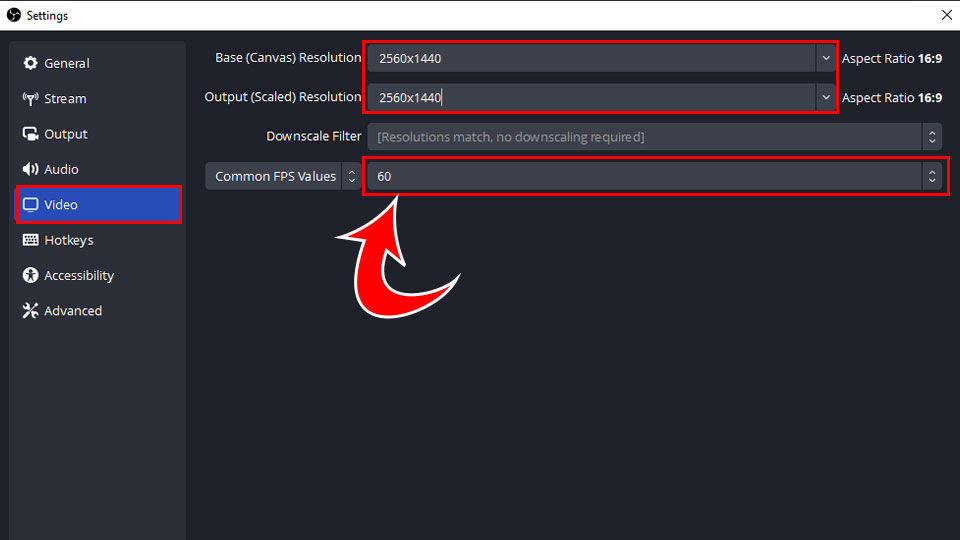
- Click Video on the left tab.
- Manually change the Base Resolution and Output Resolution to 2560×1440.
- Set Common FPS Values to 60 or 30, depending on the frames per second you desire. 60 FPS will result in smoother video.
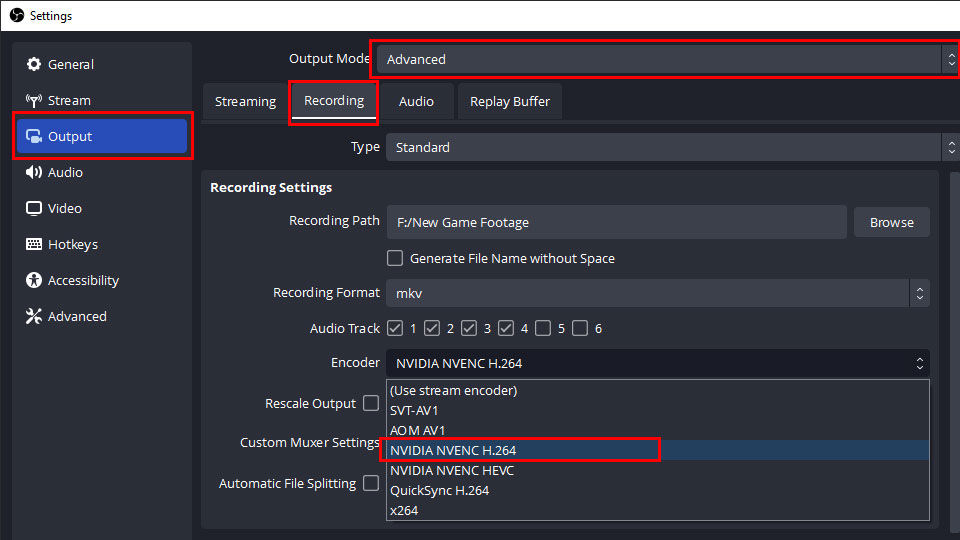
- Click Output on the left.
- Change Output Mode to Advanced.
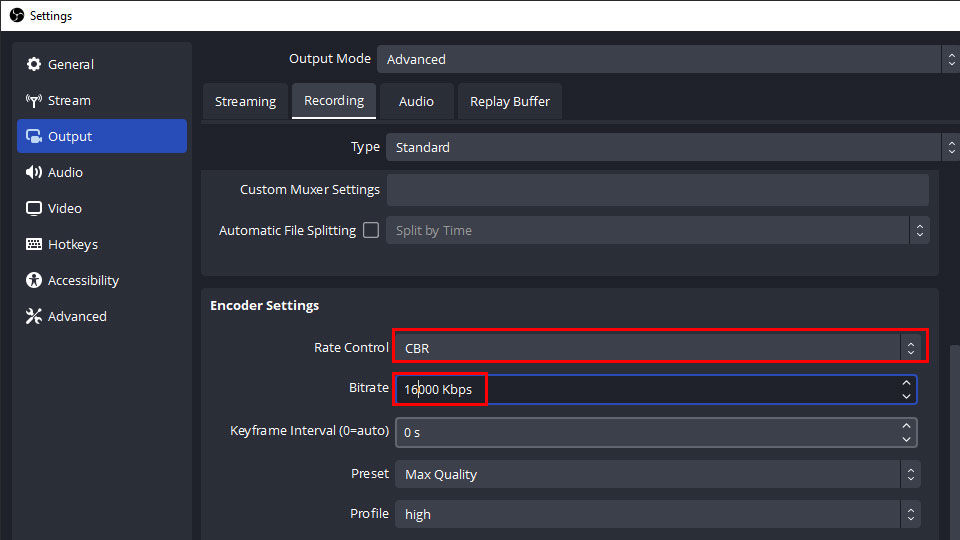
- Click the Recording tab.
- Change your Encoder to NVIDIA NVENCH or AMD AMF, depending on your video card.
- Scroll down and select CBR next to Rate Control.
- Set your Bitrate to 16000 Kbps for 30 FPS or 24000 Kbps for 60 FPS.
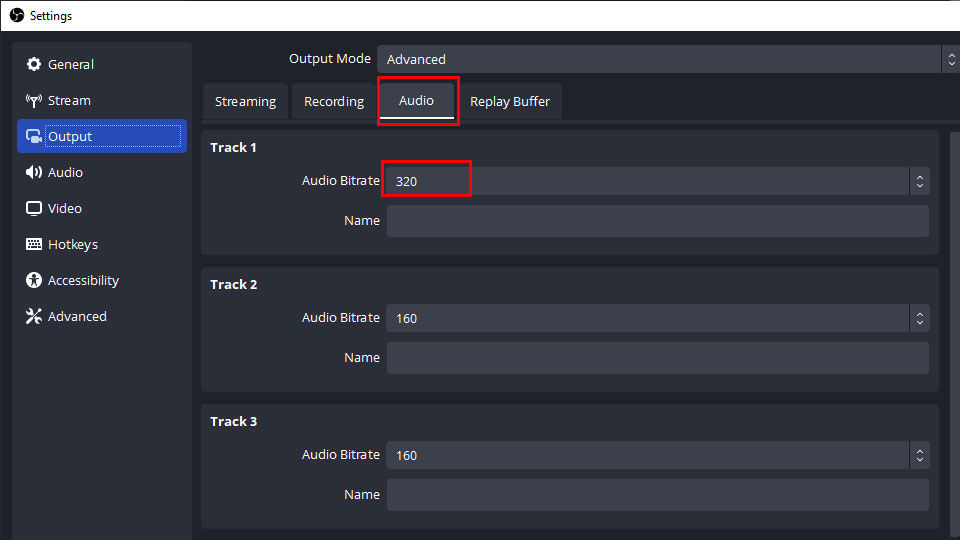
- Click the Audio tab.
- Set your Audio Bitrate for Track 1 to 320.
And there you have it! You should now be up and recording at 1440p.
If you don’t have the NVIDIA or AMD encoder options, you should consider upgrading your video card to record at this quality.
If this guide helped, see our other OBS guides in our OBS Section.

