How To Clear ARP Cache In Windows 10 and 11
Are you looking to clear your ARP cache to fix a networking issue? Here’s how to clear ARP Cache in both Windows 10 and 11.

The ARP Cache stands for the Address Resolution Protocol, entries created to connect an IP address to a MAC or Media Access Control address. If you have a duplication of an IP address on your table, you’ll need to clear your ARP cache to resolve the problem in Windows 10 or 11. If you’re having trouble connecting a machine to your local network because of the ARP cache, continue reading for two solutions.
How To Clear ARP Cache In Windows 10 and 11
To clear your ARP Cache, you can stop the Routing and Remote Access service or manually clear the ARP cache in your Command Prompt. Keep reading for step-by-step instructions using both methods.
Method 1: Using Routing and Remote Access to Clear ARP Cache
To use Routing and Remote Access services to clear your ARP cache:
- Type Services in the search menu on the bottom left of your screen.
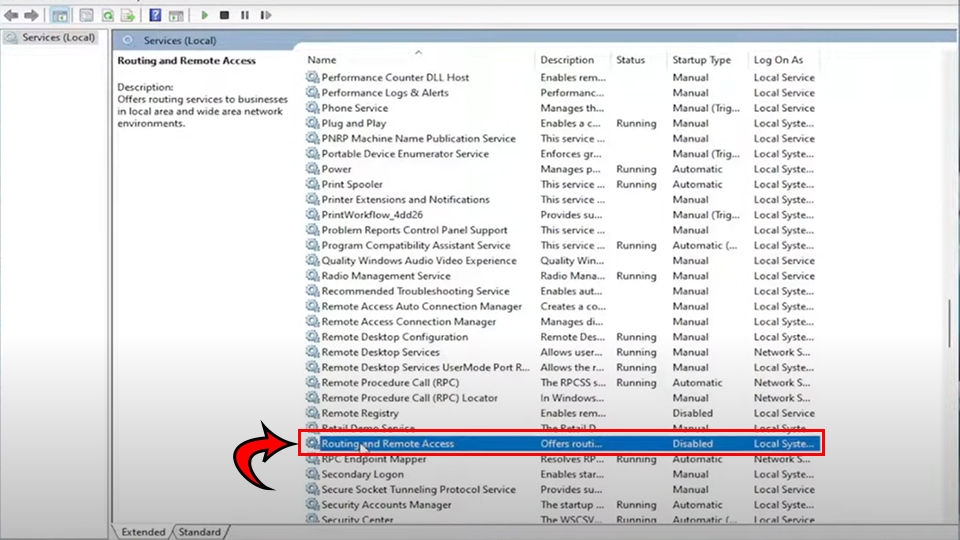
- Scroll down and double-click Routing and Remote Access.

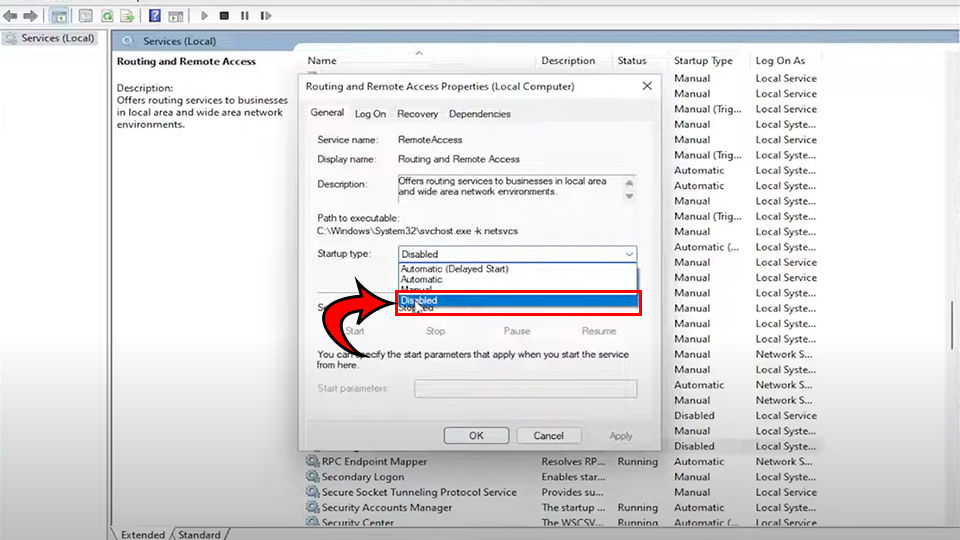
- Set Service status: to Stopped.
- Next to Startup type: select Disabled.

- Hit Appy and Ok.
- Restart your computer.
If this doesn’t work, continue reading to learn the command prompt to clear your ARP cache manually.
Method 2: Clearing ARP Cache Using Command Prompt
To clear your ARP Cache using the Command Prompt:
- Type cmd in the search menu at the bottom left of your screen.
- Right-click Command Prompt and click Run as Administrator.
- Hit Yes.
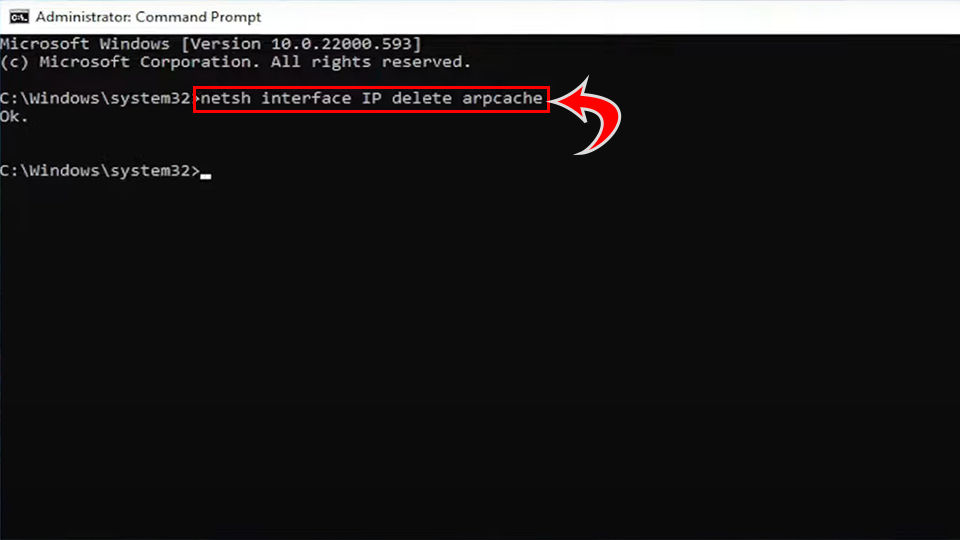
- Paste
netsh interface IP delete arpcacheinto the Command Prompt.

- Restart your computer.
And there you have it! This should hopefully resolve any errors on your network. This usually occurs when replacing hardware, but you assign the same static IP to the machine. The refresh is required for the network to recognize the new hardware.
We hope this guide helped you clear your ARP cache in Windows 10 or 11.
Did you know that we cover coding too? See our Coding Section for coding tutorials and guides.


