How to Enable Clipboard History on Windows 11
Learn how to turn on and view your clipboard history in Windows 11.
Did you accidentally copy something to your clipboard and overwrite that important item you had? Not to worry, you can turn on your clipboard history to see a list of your recently copied items. Here’s how to enable the clipboard history feature on Windows 11.
How to Enable Clipboard History on Windows 11
To turn on clipboard history on Windows 11, open the Start menu (Windows key), and search for “Clipboard settings.” Toggle the Clipboard history on, and you’ll be able to save multiple items to your clipboard.
Follow the steps below to enable your clipboard history in Windows 11:
- Open the Start menu by pressing the Windows key or clicking the Windows icon at the bottom left of your taskbar.
- Search for Clipboard settings and click on the result.
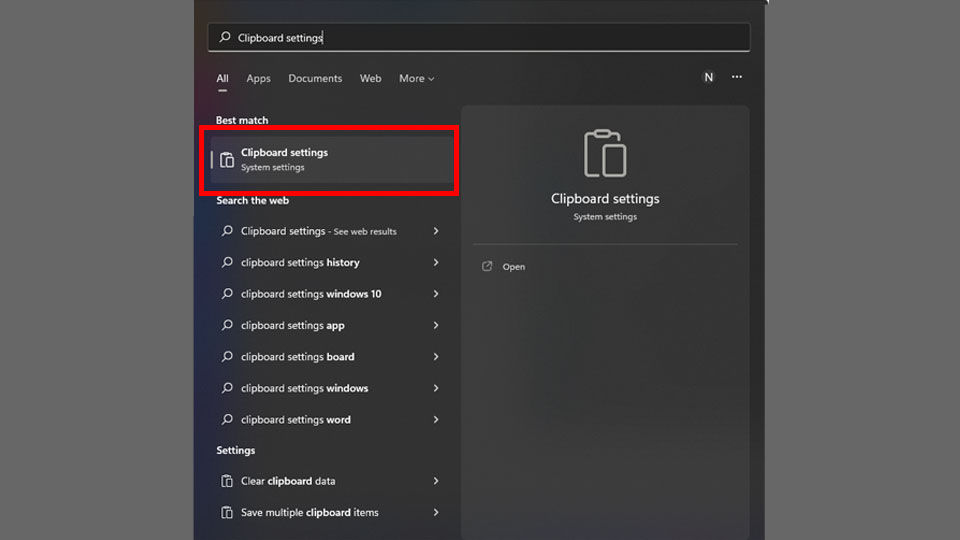
- Toggle on the slider next to Clipboard history to enable it.
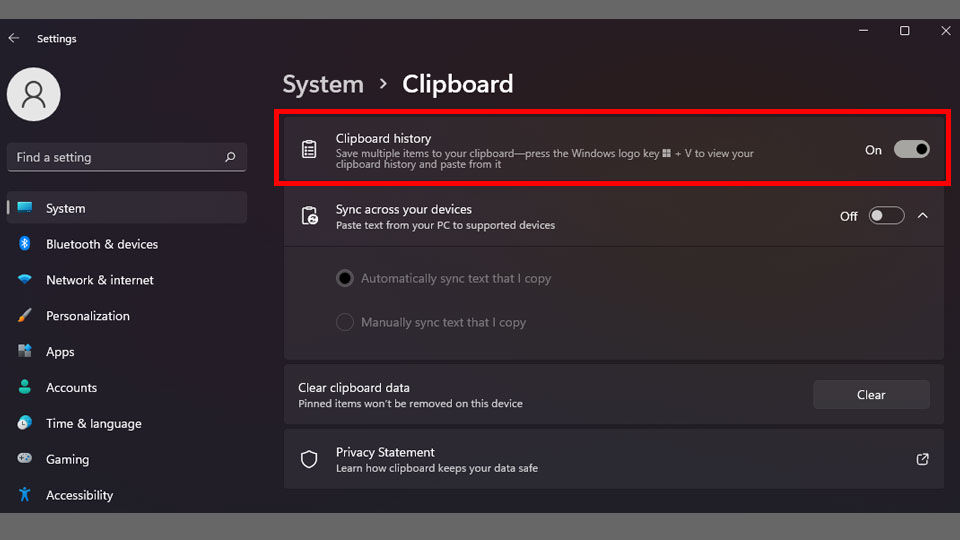
After following these steps, your clipboard history will be enabled automatically. Now, you can press the Windows key + V to view your clipboard history, which includes everything you’ve recently copied (Ctrl+C), including text and images.
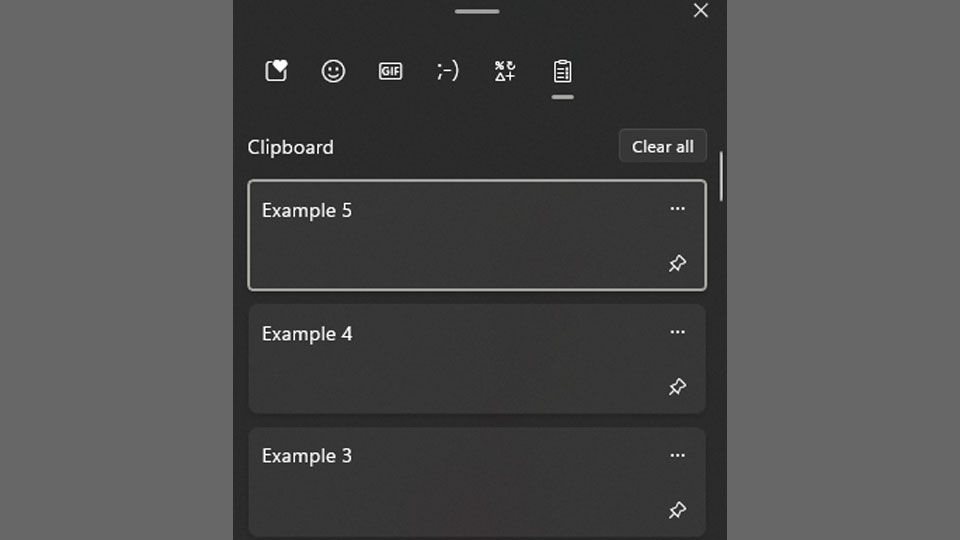
If an item on your clipboard is important, you can tap on the pushpin icon (📌) to pin it to the top of your clipboard history.
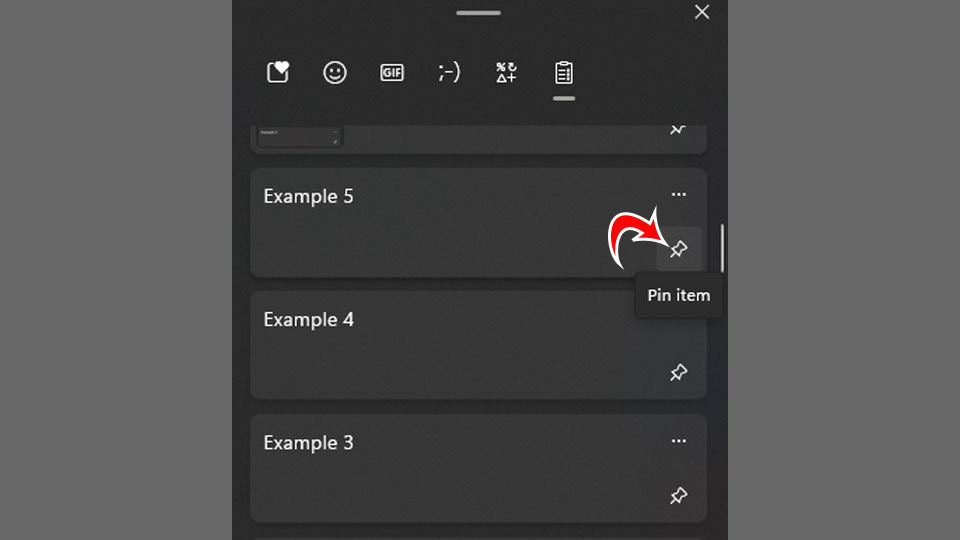
You can also quickly paste an item from the clipboard history window by left-clicking on the item. Or, you could clear the entire history by clicking on Clear all. Delete items individually by clipping the three dots to the right and selecting the trash bin icon.
The Windows clipboard is a very useful feature for Windows 11 users, and now you know how to see everything you’ve recently copied to your clipboard! It’s a free-to-use feature, so take advantage of it and don’t worry about overwriting your previously copied items any longer.
For more Windows 11 tips, see our Windows 11 Section.

