How to Export Bookmarks from Chrome
We all know that it’s essential to make routine backups of your work and files. However, one thing we tend to forget to make backups of is our browser bookmarks. Our bookmarks grow slowly over time and are often overlooked when making our backups or transferring files to new computer setups. All modern browsers provide us with an easy way to export our bookmarks for safekeeping. Let’s take a look at how to export bookmarks in Chrome.
How to Export Bookmarks in Chrome
Exporting your bookmarks out of Chrome is a straightforward process. This guide will show the process for a Chrome installation on a Windows 10 computer, but the same approach should apply to Mac as well.
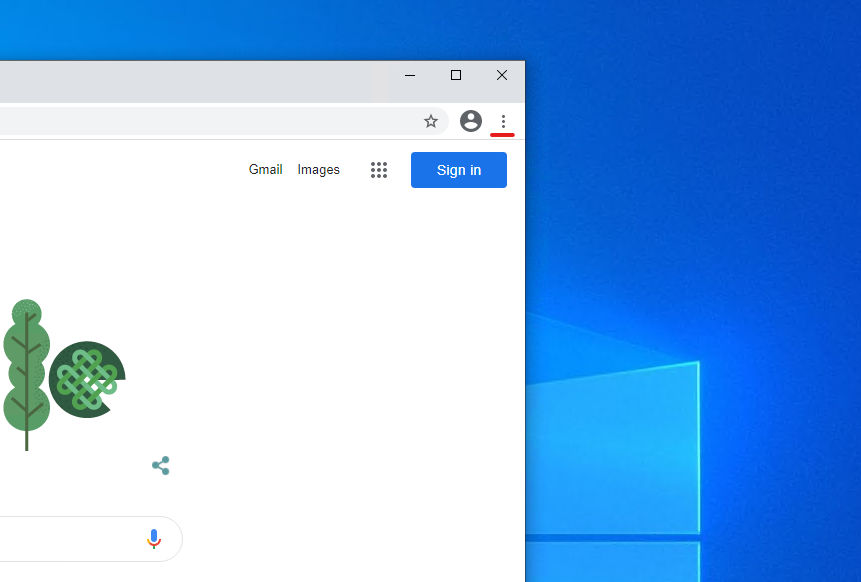
- Click the three dots at the top right corner of Chrome
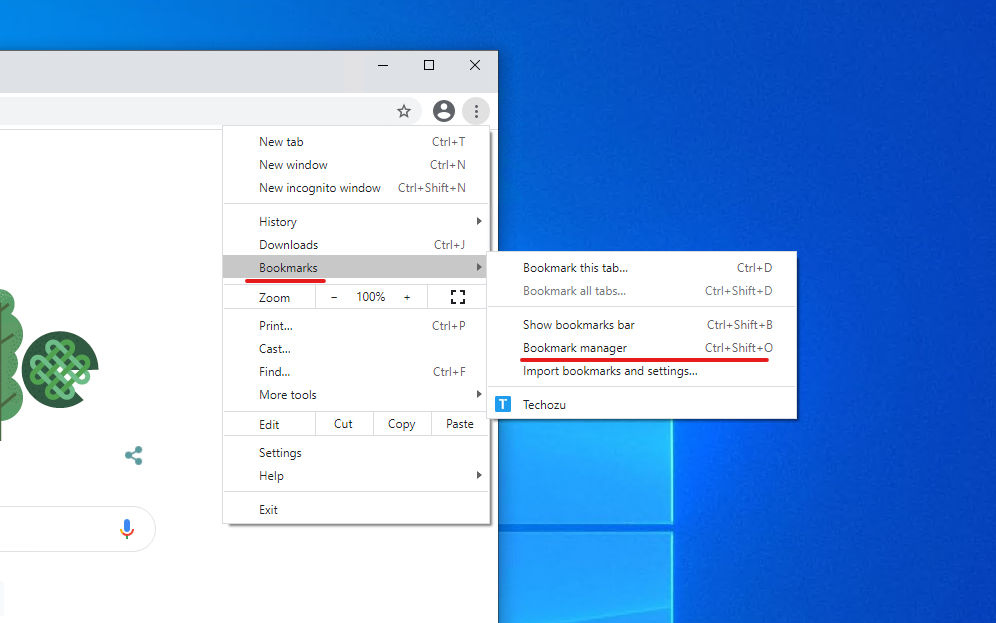
- Click Bookmarks
- Click Bookmark Manager
You can also use the keyboard shortcut Ctrl – Shift – O (Cmd – Shift – O for Mac) to get right to the Bookmark Manager window and skip the first two steps.
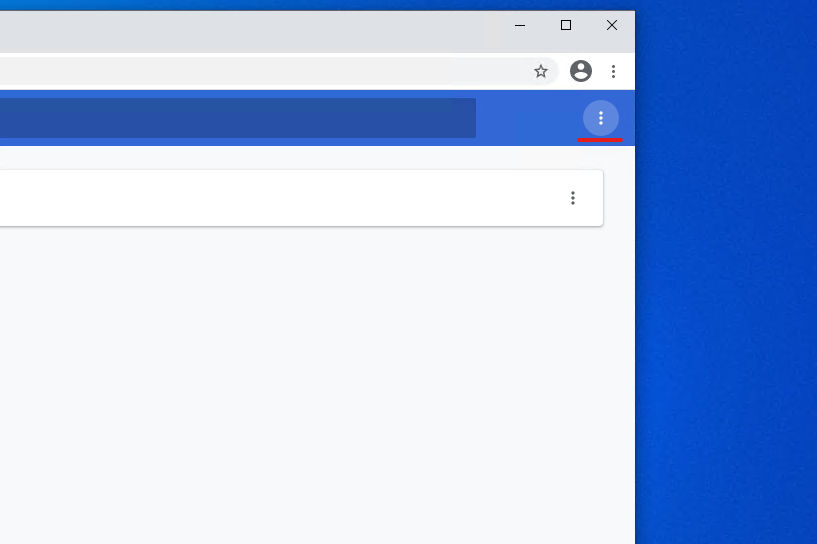
- Click the three dots in the top right corner of the Bookmark Manager
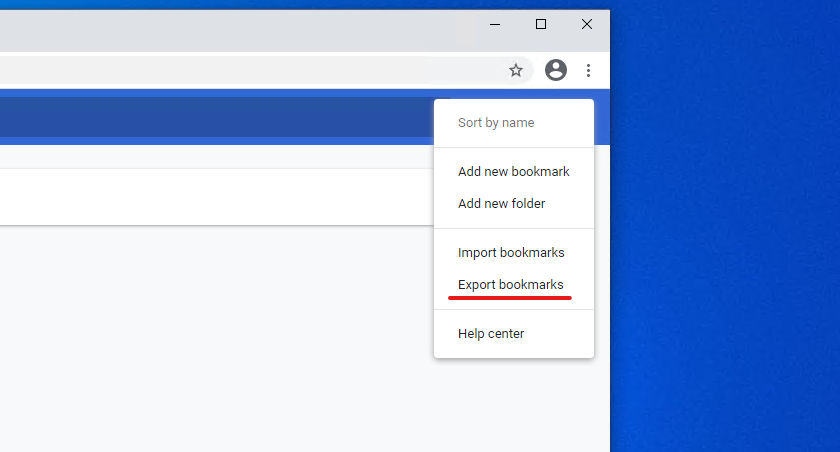
- Click Export Bookmark
- Choose a Location and hit Save
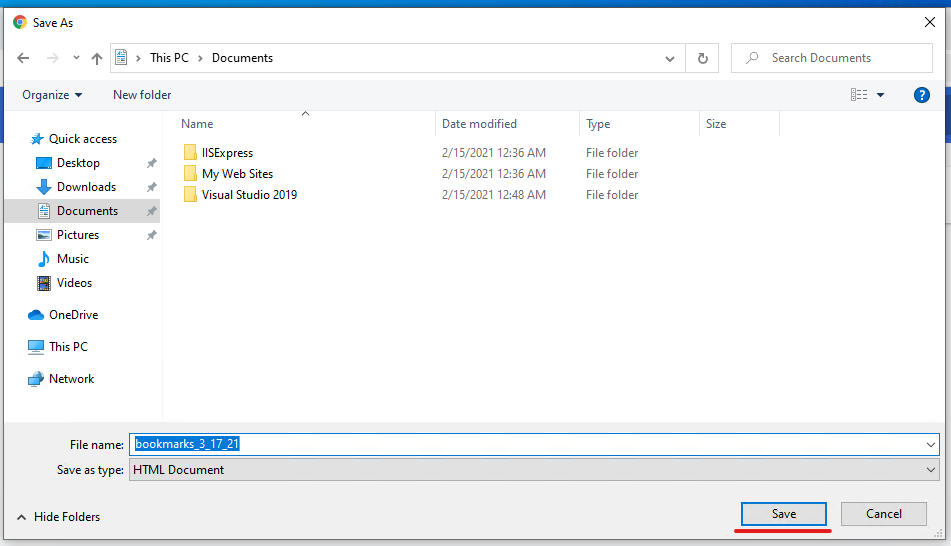
That’s all your bookmarks will save as an HTML file. You can also rename the file if you wish. By default, the name will have the date in it for easier reference later on. You can now backup this file somewhere, either onto a thumb drive or upload it to a cloud service.
Exporting your bookmarks is all well and good, but that’s only half the battle. Should the need arise, we want to be able to upload the bookmarks back into Chrome as well.
How to Import Bookmarks into Chrome
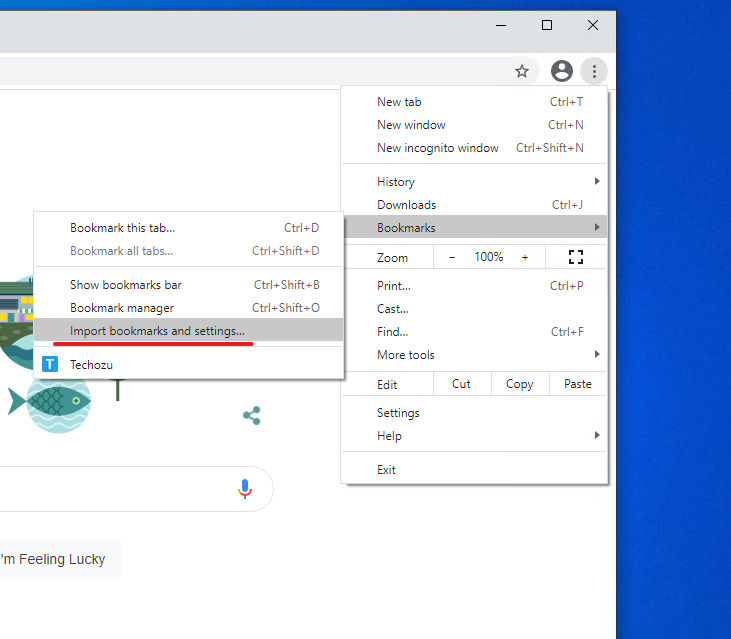
- Click the three dots in the top right corner of Chrome

- Go to Bookmarks
- Click on Import Bookmarks and Settings
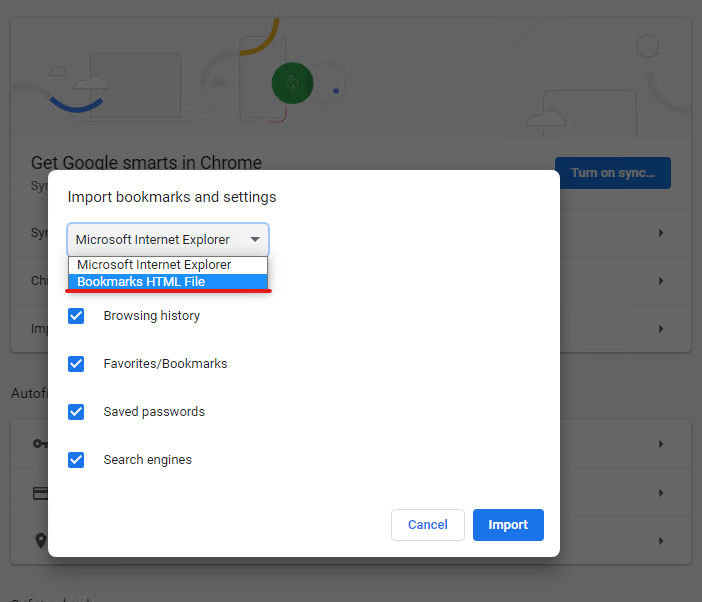
- In the Dropdown Choose “Bookmarks HTML File”
- Hit Choose File and find your bookmark HTML file you previously exported.
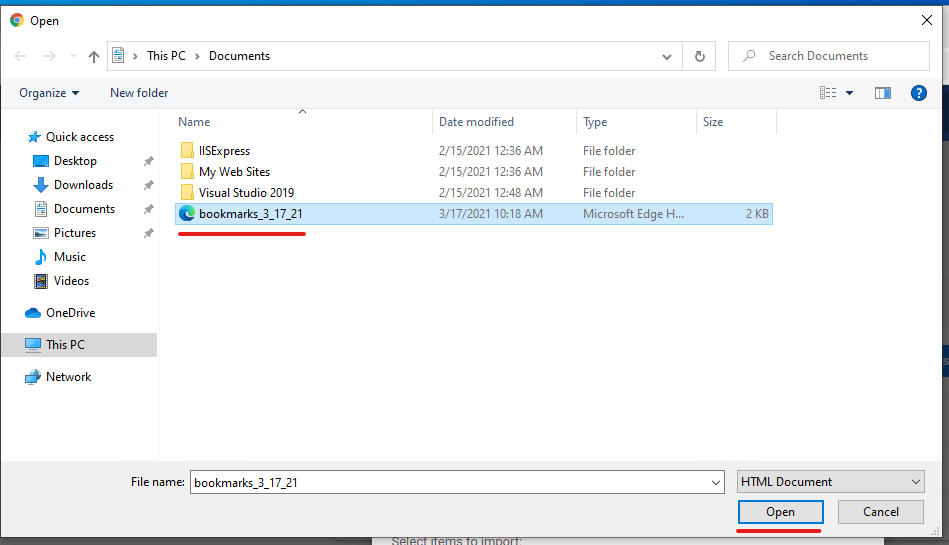
That’s all there is to it. Now you know how to export bookmarks in Chrome as well as import them back in. Remember, making backups should be a routine operation, just like keeping your computer up to date.

